
Die Seite wurde neu angelegt: „{{Location |game =FO3 |name={{PAGENAME}} |type=military |image=Fallout 3 National Guard Depot.jpg |desc=External view of the Depot |loc=Ngd_location.jpg |marker=N…“ |
KKeine Bearbeitungszusammenfassung |
||
| (56 dazwischenliegende Versionen von 23 Benutzern werden nicht angezeigt) | |||
| Zeile 1: | Zeile 1: | ||
{{ | {{Cleanup|Einige Teile sollten noch übersetzt werden.|FO3}} | ||
| | |||
{{Infobox Ort | |||
|game = FO3 | |||
|typ = militär | |||
|bild = National Guard Depot.jpg | |||
|bild desc = Außenansicht | |||
|lage = National Guard Depot loc.jpg | |||
|marker = '''Depot der Nationalgarde''' | |||
|fraktionen = Nationalgarde (Vorkriegsz.) | |||
|lokale karte = National Guard depot map.jpg | |||
|lokale karte desc = Karte der vier Abschnitte | |||
|roboter = Roboter<br />Geschütztürme | |||
|cell = NtlGuardDepotExterior (Außenbereich)<br />NtlGuardDepot01 (Eingang)<br />NtlGuardDepot04<br />NtlGuardDepot05 (Büros)<br />NtlGuardDepot06 (Waffenkammer) | |||
|refid = {{ID|0011ef}} (Außenbereich)<br />{{ID|01bc93}} (Eingang)<br />{{ID|017f57}}<br />{{ID|06f9f8}} (Büros)<br />{{ID|0228af}} (Waffenkammer) | |||
|terminal = [[Depot der Nationalgarde - Terminaleinträge]] | |||
}} | |||
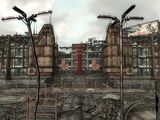
Das '''Depot der Nationalgarde''', welches sich am nördlichen Rand der Innenstadt von [[Washington, D.C.]] befindet, ist ein Hochsicherheitskomplex, der vor dem [[Großer Krieg|Großen Krieg]] das Hauptquartier der Miliz von Washington war. Man kann es über das Ödland, ohne einen Umweg durch die Metro, erreichen. Diese befindet sich direkt südlich von [[Vault 108]]. Alternativ kann man von [[Friendship Heights]] nach Osten, entlang der Gebäude, und an [[Höhlen von Rock Creek|Rock Creek Caverns]] vorbei. | |||
{{clear}} | |||
==Das Innere des Depots== | |||
{{clear}} | |||
[[Datei:NG Depot interior.jpg|right|220px]] | |||
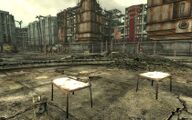
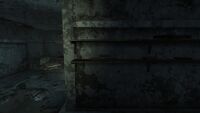
Im Inneren des Depots kann man sich trotz eines guten Orientierungssinnes leicht verlaufen, da es größtenteils gleich aussieht. Eine vollständige Erkundung ist dennoch lohnenswert, da sich im Depot viele Materialien für selbst herstellbare Waffen befinden. | |||
Will man die Beute einzusammeln, begibt man sich am besten an den Kabinen vorbei und durch die Tür am nördlichen Ende des Raumes. Anschließend biegt man links ab und nimmt die Stufen nach unten in südwestlicher Richtung. Nun sieht man durch das Loch im Boden auf der linken Seite einen Wartungsraum. Von hier aus geht man nach Osten zu dem Raum mit den [[Nuka-Cola Verkaufsautomat]]en . Neben dem Automaten und einem [[Eat'o'tronic 3000]] befindet sich die Tür zum Trainingsflügel. | |||
{{clear}} | |||
===Trainingsflügel=== | |||
[[Datei:NGD training wing.jpg|right|220px]] | |||
Der Weg führt durch eines der Löcher in der Wand in östlicher Richtung. Dort gibt es einen Korridor am nördlichen Ende des Raumes. Die Tür am östlichen Ende des Weges führt nach oben zu einem Raum mit einem Fertigkeitsbuch, einem Vorkriegsbuch und einem Safe. Wenn man dem Gang nach Westen folgt, erreicht man einen Raum mit Waffen und Munition. Dahinter befindet sich die Umkleide und östlich davon der Schießstand. Die hintere südöstliche Tür führt zu einem Raum mit drei Munitionskisten und vier Erste-Hilfe-Kästen. Dahinter befinden sich die Büros. | |||
{{clear}} | |||
=== | ===Büros=== | ||
[[Datei:NGD offices.jpg|right|220px]] | |||
In den Büros kann man sich leichter zurechtfinden. Wenn man die erste Treppe auf dem Weg zur zweiten hinab steigt, findet man hinter der verschlossenen Tür am Ende der Stufen die Geschützturmkontrolle. Am Ende der zweiten Treppe befindet sich südlich ein Raum. Hinter dem Schreibtisch geht man die Stufen hinauf und nach Westen. Im nächsten Raum begibt man sich in die nordwestliche Ecke, um über den Schutt ins nächste Stockwerk zu klettern. | |||
Hinter der dortigen Tür befindet sich ein Wachroboter. Außerdem führt sie zu den oberen Stockwerken des Depots. | |||
Zurück im Depot befindet man sich in einem Raum, mit einem umgestürzten Nuka-Cola Automaten in der westlichen Ecke des Raumes befindet sich der Schalter zum Öffnen des Wartungsraumes. Von dort kann man über den Tisch springen und mindestens einen Wachroboter angreifen und anschließend einfach zu den unteren Stockwerken springen. | |||
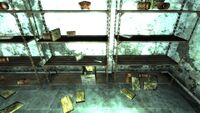
===Waffenkammer der Nationalgarde=== | |||
Die Waffenkammer kann betreten werden, nachdem man den oben angegebenen Weg genommen hat. Alternativ kann der Schalter auch erreicht werden, indem man von einem Gefälle in der Mitte des Raumes springt. Sobald man ins Depot zurückkehrt, findet man einen elektrischen Schalter, etwa 4,5 Meter links. Er öffnet die Wartungstür zwei Etagen tiefer, wodurch man die Waffenkammer betreten kann. Die Tür kann nicht mit einem Dietrich geöffnet werden, obwohl das Schloss als sehr schwer angezeigt wird. Vorsicht ist geboten, denn hinter der Tür ist ein Wachroboter oder Mr. Gutsy. Durch Aktivieren des Schalters im Versorgungsraum öffnet man eine Falltür zur Waffenkammer. | |||
== | ===Bunker der Nationalgarde=== | ||
[[Datei:NGD_armory.jpg|220px|right]] | |||
Den Bunker der Nationalgarde, den man über die Waffenkammer erreicht, kann man mit mit allen [[Transkript der Familie Keller|Transkripten der Familie Keller]] öffnen. Möglicherweise trifft man dort auch auf einen [[Leuchtende]]n. Im Bunker findet man neben dem [[Experimentelles MIRV|Experimentellen MIRV]] und einer Werkbank weitere [[#Bunker|Beute]]. Darunter befinden sich alle Komponenten einer [[Nuka-Granate]], die man auf der Werkbank herstellen kann, wenn man das entsprechende [[Diagramm - Nuka-Granate]] besitzt. | |||
== | ==Beute== | ||
===Depot=== | |||
[[Datei:National Guard depot loc map.jpg|200px|right]] | |||
*[[Nikola Tesla und Sie]] befindet sich im Depot, in einem Lagerraum auf der niedrigsten Ebene (Wenn man vor der "Sehr schweren" Tür zur Waffenkammer steht, befindet es sich im Lagerraum direkt rechts, auf einem der Regale.) | |||
*[[Vorkriegsbuch]]: Zwei im dritten Stock, nachdem man die Treppe auf der linken Seite, wenn man aus dem Ödland kommt, heraufsteigt. Erreichbar über die Bretter und das Rohr am Ende der Treppe. Die Bücher sind auf dem obersten Regal an der östlichen Wand. Dort ist auch eine weitere Treppe an der südlichen Wand, in der südöstlichen Ecke des Raumes. | |||
== | ===Trainingsflügel=== | ||
[[Datei:NG depot training wing loc.jpg|200px|right]] | |||
*Im einzigen Raum am Ende des Ganges der östlichen Treppe. Direkt nach dem Betreten sieht man einen Schreibtisch mit dem Buch [[Geschichten eines Dörrfleischverkäufers aus Junktown]] darauf. | |||
*[[ | *Im angrenzenden Raum ist ein Safe. Durch einen zusammengebrochenen Teil der Wand gelangt man zu einem Raum mit einem durchschnittlich verschlossenen Safe. | ||
*Vorkriegsbuch auf dem oben genannten Safe. | |||
{{clear}} | |||
=== | ===Büros=== | ||
[[Datei:NG depot offices loc.jpg|200px|right]] | |||
*[[Deckung!]] liegt auf einem langen Schalter in einem verstrahlten Bereich | |||
*[[ | * Drei weitere Vorkriegsbücher in den Büros, in der Mitte eines offenen, eingestürzten, zweistöckigen Zimmers, ein Stockwerk über dem oben erwähnten Schalter. | ||
{{clear}} | |||
=== | ===Waffenlager=== | ||
*[[ | [[Datei:Bobblehead_Small_Guns_NGD.jpg|200px|right]] | ||
* | * Die [[Wackelpuppe - Kleine Waffen]] befindet sich auf einem Regal im versiegelten Lagerraum im Keller des Waffenlagers | ||
* Eine große Menge Munition und Ausrüstung des Militärs: | |||
**2 [[10-mm-Maschinenpistole (Fallout 3)|10-mm-Maschinenpistolem]] | |||
**2 [[10-mm-Pistole]]n | |||
**84x [[10-mm-Schuss]] | |||
**2x [[Kampfrüstung|Kampfkleidung]] | |||
**4 [[Kampfrüstung|Kampf Helme]] | |||
**4 [[Kampfmesser (Fallout 3)|Kampfmesser]] | |||
**4 [[Polizeiknüppel]] | |||
**4 [[Splittergranate]]n | |||
**4 [[Splittermine]]n | |||
**4 [[Impulsgranate]]n | |||
**4 [[Impulsmine]]n | |||
**1 [[Minigun]] | |||
**1 [[Raketenwerfer]] | |||
**10 [[Rakete]]n | |||
**2 [[Strahlenschutzanzug (Fallout 3)|Strahlenschutzanzüge]] | |||
{{clear}} | |||
=== | ===Bunker=== | ||
[[Datei:National Guard armory loc.jpg|200px|right]] | |||
* | * Fünf [[Mini-Atombombe (Fallout 3)|Mini-Atombomben]] | ||
* Das [[Experimentelles MIRV|Experimentelle MIRV]], ein einzigartiger [[Fat Man]] | |||
* | * Eine [[Nuka-Cola Quantum]] (unter dem Tisch mit dem Experimentellen MIRV) | ||
* Eine Kopie von [[US Army: 30 praktische Rezepte für den Flammenwerfer]] (auf den gleichen Tisch wie das Experimentelle MIRV) | |||
* | * Alle Komponenten für eine [[Nuka-Granate]] ([[Nuka-Cola Quantum]], [[Abraxo-Putzmittel]], [[Blechdose]] und [[Terpentin]]) | ||
* | * Eine Plasmagranate in einem Kochtopf auf dem ersten Regal auf der linken Seite. | ||
* | * Zwei [[Erste-Hilfe-Kasten|Erste-Hilfe-Kästen]] | ||
* Eine [[.32-Pistole (Fallout 3)|.32er Pistole]] mit etwas Munition neben einem der Erste-Hilfe-Kästen | |||
* Ein Safe mit einer weiteren .32er Pistole, etwas Munition und einigen Kronkorken | |||
* Eine Munitionskiste auf den ersten Regalen in der Mitte des Raumes. | |||
{{clear}} | |||
* | |||
* | |||
* | |||
* | |||
== | ==NPCs== | ||
Im Depot der Nationalgarde befinden sich hauptsächlich [[Wachbot|Wachroboter]], [[Mister Gutsy]]s, [[Protektron]]s, and [[Robohirn]]e. Daher ist es ratsam [[Impulsgranate]]n und eine starke Waffe mitzunehmen. [[Mr. Keller]] ist in dem Bunker mit dem Experimentellem MIRV. | |||
== | ==Hinweise== | ||
* | * Im Bunker befinden sich einige freie Betten, eine [[Werkbank]], und viel Stauraum. Sobald man den Leuchtenden besiegt hat, kann der Spieler ihn als Ersatzwohnort verwenden. | ||
* | *Nach [[Das Wasser des Lebens]] kann man einen [[Vertibird]] über das Depot fliegen sehen, wenn man sich in einem Teil des Gebäudes befindet. | ||
== | ==Fehler== | ||
* {{ | * {{Plattformen|pc|ps3|xbox360}} Man kann in den Bunker gelangen ohne die Transkripte zu besitzen. Um dies zu erreichen, lauft in die Ecke, wo sich das Zugangsterminal für die Tür und den Bunker befindet. Dann ducken, in die Dritte Person Ansicht wechseln und dreht die Kamera bis die Meldung erscheint "Aktiviere Elektrischen Schalter". Der Auslöser ist sehr klein, sollte aber an der Tür oder dem Türrahmen, ein bisschen höher als der Kopf des Spielers angezeigt werden. Aktiviere ihn, und die Tür des Bunkers öffnet sich. Dies ist eine brillante und zeitsparende Idee und kann genutzt werden, wenn man keine Lust hat, die ganzen Transkripte zu suchen. Although, directly on the other side of that corner of the acess terminal wall and bunker (the side with the Radiation Suits), the same method can be applied and gain you acess into the bunker. | ||
* A character with high Agility can enter the Armory without going through the Training Wing and Depot Offices. Locate the staircase in the middle of the eastern wall of the National Guard Depot, and climb to the top. From there, head due west past the fallen steel truss, around or over the gap in the floor, and go through the open doorway. Straight ahead is a pile of fallen floors or walls blocking another staircase. By jumping up the left side of this rubble (place a barrel to jump on) and then crouching, it's possible to climb the rubble and stairs to gain access the the highest level of the building. From there, head to the far southeast corner where you can jump down to the electrical switch to the Armory. | * A character with high Agility can enter the Armory without going through the Training Wing and Depot Offices. Locate the staircase in the middle of the eastern wall of the National Guard Depot, and climb to the top. From there, head due west past the fallen steel truss, around or over the gap in the floor, and go through the open doorway. Straight ahead is a pile of fallen floors or walls blocking another staircase. By jumping up the left side of this rubble (place a barrel to jump on) and then crouching, it's possible to climb the rubble and stairs to gain access the the highest level of the building. From there, head to the far southeast corner where you can jump down to the electrical switch to the Armory. | ||
* There is another way to get up using only one barrel at the northwestern end of the second floor down, push a barrel to the top of the ramp, and jump to the top. | * There is another way to get up using only one barrel at the northwestern end of the second floor down, push a barrel to the top of the ramp, and jump to the top. | ||
* There is a way to get to the top of the National Guard Depot building by only having to use two barrels. The player has to go to the middle of the fourth floor then go to the fallen radio tower and the caved in ceiling. From there the player has to put a barrel on the radio tower and jump on it from the collapsed ceiling, putting the player on the fifth floor. The player then has to go to the inaccessible stair case with the emergency lights. Put a barrel on the patch of rubble by the collapsed cubicle. Jump on the tallest corner of the collapsed cubicle, then jump on the barrel and then to the top floor. | * There is a way to get to the top of the National Guard Depot building by only having to use two barrels. The player has to go to the middle of the fourth floor then go to the fallen radio tower and the caved in ceiling. From there the player has to put a barrel on the radio tower and jump on it from the collapsed ceiling, putting the player on the fifth floor. The player then has to go to the inaccessible stair case with the emergency lights. Put a barrel on the patch of rubble by the collapsed cubicle. Jump on the tallest corner of the collapsed cubicle, then jump on the barrel and then to the top floor. | ||
* {{ | * {{Plattformen|pc|ps3|xbox360}} Yet another method to get to the top floor in the Depot is simply to go to the collapsed staircase which ''looks'' impossible to get through, but with just a little jerking you can sneak through the small gap in the "ruined" staircase. Go to the left side of the staircase, crouch, back up a little and jump onto the rubble. Crouching before jumping will keep you crouched when you land. Simply walk forward and jump over the remaining rubble blocking the door way. When you get through and topside, simply walk over to the place where the switch is, at the far end of the depot. | ||
* Just before leaving the Training Wing to the Offices, a locker can be seen that floats about a foot off of the ground. | * Just before leaving the Training Wing to the Offices, a locker can be seen that floats about a foot off of the ground. | ||
== | ==Vorkommen== | ||
{{ | Das {{Pagename nd}} kann nur in {{FO3}} betreten werden. | ||
== | ==Videos== | ||
[[Datei:Fallout 3 Bobblehead -Small Guns-|thumb|Ein schnellerer Weg zum Öffnen der Waffenkammer|425px|left]] | |||
{{clear}} | |||
: | [[Datei:Fallout 3 Glitch - MIRV (National Guard Bunker) access WITHOUT TRANSCRIPTS|thumb|Glitch: Ins Innere des Bunkers ohne Transkripte gelangen|425px|left]] | ||
{{clear}} | |||
== | ==Galerie== | ||
<gallery widths= | <gallery widths=200> | ||
National Guard Depot.jpg|Closeup of the entrance | |||
Fo3 MIRV HFR mini nukes NGD.jpgThe [[experimental MIRV]] with mini nukes and a ''[[U.S. Army: 30 Handy Flamethrower Recipes]]'' | |||
National Guard depot 1 of 2 ammo cans.jpg|One of two ammo containers around a building to the depot's right | |||
National Guard depot Courtyard loot.jpg|Depot courtyard loot | |||
National Guard depot motor pool.jpg|Depot motor pool | |||
Nikola Tesla and You NGD.jpg|''[[Nikola Tesla and You (Fallout 3)|Nikola Tesla and You]]'', lower level | |||
Fo3 NG depot oversized D&C.jpg|The oversized ''[[Duck and Cover! (Fallout 3)|Duck & Cover]]'', compared to a normal-sized copy (left) in the offices | |||
Fo3 Tales of a JJV NGD tw.jpg|[[Tales of a Junktown Jerky Vendor (Fallout 3)|Tales of a Junktown Jerky Vendor]] | |||
NG depot bottlecap mine.jpg|[[Bottlecap mine (Fallout 3)|Bottlecap mine]] in the depot | |||
NG depot armory bottlecap mine.jpg|In the armory | |||
Fo3 MIRV HFR mini nukes NGD.jpg|[[Experimental MIRV]] and a [[Nuka-Cola Quantum (Fallout 3)|Nuka-Cola Quantum]] | |||
Fo3 prewar book NGD.jpg|[[Pre-War book (Fallout 3)|Pre-War book]] | |||
Fo3 prewar book NGD tw.jpg|Pre-War book | |||
Fo3 prewar book NGD do.jpg|Pre-War book | |||
Fo3 frag mines NGD armory.jpg|Unarmed [[Frag mine (Fallout 3)|frag mines]] and [[Frag grenade (Fallout 3)|frag grenades]] | |||
</gallery> | </gallery> | ||
[[en:National Guard depot]] | |||
[[es:Almacén de la Guardia Nacional]] | |||
[[ru:База Национальной гвардии]] | |||
[[uk:База Національної гвардії]] | |||
[[zh:National Guard Depot]] | |||
[[Kategorie:Fallout 3: Orte]] | |||
[[Kategorie:Militär- und Forschungseinrichtungen]] | |||
Aktuelle Version vom 16. November 2024, 16:30 Uhr
| Dieser Artikel oder Abschnitt muss überarbeitet werden, um den Qualitätsstandards des Fallout Wikis zu entsprechen. Du kannst helfen, indem du den Artikel verbesserst. → (Einige Teile sollten noch übersetzt werden.) |
|---|
-->]]
Das Depot der Nationalgarde, welches sich am nördlichen Rand der Innenstadt von Washington, D.C. befindet, ist ein Hochsicherheitskomplex, der vor dem Großen Krieg das Hauptquartier der Miliz von Washington war. Man kann es über das Ödland, ohne einen Umweg durch die Metro, erreichen. Diese befindet sich direkt südlich von Vault 108. Alternativ kann man von Friendship Heights nach Osten, entlang der Gebäude, und an Rock Creek Caverns vorbei.
Das Innere des Depots

Im Inneren des Depots kann man sich trotz eines guten Orientierungssinnes leicht verlaufen, da es größtenteils gleich aussieht. Eine vollständige Erkundung ist dennoch lohnenswert, da sich im Depot viele Materialien für selbst herstellbare Waffen befinden.
Will man die Beute einzusammeln, begibt man sich am besten an den Kabinen vorbei und durch die Tür am nördlichen Ende des Raumes. Anschließend biegt man links ab und nimmt die Stufen nach unten in südwestlicher Richtung. Nun sieht man durch das Loch im Boden auf der linken Seite einen Wartungsraum. Von hier aus geht man nach Osten zu dem Raum mit den Nuka-Cola Verkaufsautomaten . Neben dem Automaten und einem Eat'o'tronic 3000 befindet sich die Tür zum Trainingsflügel.
Trainingsflügel

Der Weg führt durch eines der Löcher in der Wand in östlicher Richtung. Dort gibt es einen Korridor am nördlichen Ende des Raumes. Die Tür am östlichen Ende des Weges führt nach oben zu einem Raum mit einem Fertigkeitsbuch, einem Vorkriegsbuch und einem Safe. Wenn man dem Gang nach Westen folgt, erreicht man einen Raum mit Waffen und Munition. Dahinter befindet sich die Umkleide und östlich davon der Schießstand. Die hintere südöstliche Tür führt zu einem Raum mit drei Munitionskisten und vier Erste-Hilfe-Kästen. Dahinter befinden sich die Büros.
Büros

In den Büros kann man sich leichter zurechtfinden. Wenn man die erste Treppe auf dem Weg zur zweiten hinab steigt, findet man hinter der verschlossenen Tür am Ende der Stufen die Geschützturmkontrolle. Am Ende der zweiten Treppe befindet sich südlich ein Raum. Hinter dem Schreibtisch geht man die Stufen hinauf und nach Westen. Im nächsten Raum begibt man sich in die nordwestliche Ecke, um über den Schutt ins nächste Stockwerk zu klettern.
Hinter der dortigen Tür befindet sich ein Wachroboter. Außerdem führt sie zu den oberen Stockwerken des Depots.
Zurück im Depot befindet man sich in einem Raum, mit einem umgestürzten Nuka-Cola Automaten in der westlichen Ecke des Raumes befindet sich der Schalter zum Öffnen des Wartungsraumes. Von dort kann man über den Tisch springen und mindestens einen Wachroboter angreifen und anschließend einfach zu den unteren Stockwerken springen.
Waffenkammer der Nationalgarde
Die Waffenkammer kann betreten werden, nachdem man den oben angegebenen Weg genommen hat. Alternativ kann der Schalter auch erreicht werden, indem man von einem Gefälle in der Mitte des Raumes springt. Sobald man ins Depot zurückkehrt, findet man einen elektrischen Schalter, etwa 4,5 Meter links. Er öffnet die Wartungstür zwei Etagen tiefer, wodurch man die Waffenkammer betreten kann. Die Tür kann nicht mit einem Dietrich geöffnet werden, obwohl das Schloss als sehr schwer angezeigt wird. Vorsicht ist geboten, denn hinter der Tür ist ein Wachroboter oder Mr. Gutsy. Durch Aktivieren des Schalters im Versorgungsraum öffnet man eine Falltür zur Waffenkammer.
Bunker der Nationalgarde

Den Bunker der Nationalgarde, den man über die Waffenkammer erreicht, kann man mit mit allen Transkripten der Familie Keller öffnen. Möglicherweise trifft man dort auch auf einen Leuchtenden. Im Bunker findet man neben dem Experimentellen MIRV und einer Werkbank weitere Beute. Darunter befinden sich alle Komponenten einer Nuka-Granate, die man auf der Werkbank herstellen kann, wenn man das entsprechende Diagramm - Nuka-Granate besitzt.
Beute
Depot

- Nikola Tesla und Sie befindet sich im Depot, in einem Lagerraum auf der niedrigsten Ebene (Wenn man vor der "Sehr schweren" Tür zur Waffenkammer steht, befindet es sich im Lagerraum direkt rechts, auf einem der Regale.)
- Vorkriegsbuch: Zwei im dritten Stock, nachdem man die Treppe auf der linken Seite, wenn man aus dem Ödland kommt, heraufsteigt. Erreichbar über die Bretter und das Rohr am Ende der Treppe. Die Bücher sind auf dem obersten Regal an der östlichen Wand. Dort ist auch eine weitere Treppe an der südlichen Wand, in der südöstlichen Ecke des Raumes.
Trainingsflügel

- Im einzigen Raum am Ende des Ganges der östlichen Treppe. Direkt nach dem Betreten sieht man einen Schreibtisch mit dem Buch Geschichten eines Dörrfleischverkäufers aus Junktown darauf.
- Im angrenzenden Raum ist ein Safe. Durch einen zusammengebrochenen Teil der Wand gelangt man zu einem Raum mit einem durchschnittlich verschlossenen Safe.
- Vorkriegsbuch auf dem oben genannten Safe.
Büros

- Deckung! liegt auf einem langen Schalter in einem verstrahlten Bereich
- Drei weitere Vorkriegsbücher in den Büros, in der Mitte eines offenen, eingestürzten, zweistöckigen Zimmers, ein Stockwerk über dem oben erwähnten Schalter.
Waffenlager

- Die Wackelpuppe - Kleine Waffen befindet sich auf einem Regal im versiegelten Lagerraum im Keller des Waffenlagers
- Eine große Menge Munition und Ausrüstung des Militärs:
Bunker

- Fünf Mini-Atombomben
- Das Experimentelle MIRV, ein einzigartiger Fat Man
- Eine Nuka-Cola Quantum (unter dem Tisch mit dem Experimentellen MIRV)
- Eine Kopie von US Army: 30 praktische Rezepte für den Flammenwerfer (auf den gleichen Tisch wie das Experimentelle MIRV)
- Alle Komponenten für eine Nuka-Granate (Nuka-Cola Quantum, Abraxo-Putzmittel, Blechdose und Terpentin)
- Eine Plasmagranate in einem Kochtopf auf dem ersten Regal auf der linken Seite.
- Zwei Erste-Hilfe-Kästen
- Eine .32er Pistole mit etwas Munition neben einem der Erste-Hilfe-Kästen
- Ein Safe mit einer weiteren .32er Pistole, etwas Munition und einigen Kronkorken
- Eine Munitionskiste auf den ersten Regalen in der Mitte des Raumes.
NPCs
Im Depot der Nationalgarde befinden sich hauptsächlich Wachroboter, Mister Gutsys, Protektrons, and Robohirne. Daher ist es ratsam Impulsgranaten und eine starke Waffe mitzunehmen. Mr. Keller ist in dem Bunker mit dem Experimentellem MIRV.
Hinweise
- Im Bunker befinden sich einige freie Betten, eine Werkbank, und viel Stauraum. Sobald man den Leuchtenden besiegt hat, kann der Spieler ihn als Ersatzwohnort verwenden.
- Nach Das Wasser des Lebens kann man einen Vertibird über das Depot fliegen sehen, wenn man sich in einem Teil des Gebäudes befindet.
Fehler


 Man kann in den Bunker gelangen ohne die Transkripte zu besitzen. Um dies zu erreichen, lauft in die Ecke, wo sich das Zugangsterminal für die Tür und den Bunker befindet. Dann ducken, in die Dritte Person Ansicht wechseln und dreht die Kamera bis die Meldung erscheint "Aktiviere Elektrischen Schalter". Der Auslöser ist sehr klein, sollte aber an der Tür oder dem Türrahmen, ein bisschen höher als der Kopf des Spielers angezeigt werden. Aktiviere ihn, und die Tür des Bunkers öffnet sich. Dies ist eine brillante und zeitsparende Idee und kann genutzt werden, wenn man keine Lust hat, die ganzen Transkripte zu suchen. Although, directly on the other side of that corner of the acess terminal wall and bunker (the side with the Radiation Suits), the same method can be applied and gain you acess into the bunker.
- A character with high Agility can enter the Armory without going through the Training Wing and Depot Offices. Locate the staircase in the middle of the eastern wall of the National Guard Depot, and climb to the top. From there, head due west past the fallen steel truss, around or over the gap in the floor, and go through the open doorway. Straight ahead is a pile of fallen floors or walls blocking another staircase. By jumping up the left side of this rubble (place a barrel to jump on) and then crouching, it's possible to climb the rubble and stairs to gain access the the highest level of the building. From there, head to the far southeast corner where you can jump down to the electrical switch to the Armory.
- There is another way to get up using only one barrel at the northwestern end of the second floor down, push a barrel to the top of the ramp, and jump to the top.
- There is a way to get to the top of the National Guard Depot building by only having to use two barrels. The player has to go to the middle of the fourth floor then go to the fallen radio tower and the caved in ceiling. From there the player has to put a barrel on the radio tower and jump on it from the collapsed ceiling, putting the player on the fifth floor. The player then has to go to the inaccessible stair case with the emergency lights. Put a barrel on the patch of rubble by the collapsed cubicle. Jump on the tallest corner of the collapsed cubicle, then jump on the barrel and then to the top floor.
- Yet another method to get to the top floor in the Depot is simply to go to the collapsed staircase which looks impossible to get through, but with just a little jerking you can sneak through the small gap in the "ruined" staircase. Go to the left side of the staircase, crouch, back up a little and jump onto the rubble. Crouching before jumping will keep you crouched when you land. Simply walk forward and jump over the remaining rubble blocking the door way. When you get through and topside, simply walk over to the place where the switch is, at the far end of the depot.
- Just before leaving the Training Wing to the Offices, a locker can be seen that floats about a foot off of the ground.
Vorkommen
Das Depot der Nationalgarde kann nur in ![]() Fallout 3 betreten werden.
Fallout 3 betreten werden.
Videos
Galerie
-
 Closeup of the entrance
 -
 One of two ammo containers around a building to the depot's right
 -
 Depot courtyard loot
 -
 Depot motor pool
 -
 Nikola Tesla and You, lower level
 -
 The oversized Duck & Cover, compared to a normal-sized copy (left) in the offices
 -

-
 Bottlecap mine in the depot
 -
 In the armory
 -

-

-
 Pre-War book
 -
 Pre-War book
 -
 Unarmed frag mines and frag grenades


es:Almacén de la Guardia Nacional ru:База Национальной гвардии uk:База Національної гвардії zh:National Guard Depot