
KKeine Bearbeitungszusammenfassung |
|||
| (10 dazwischenliegende Versionen von 3 Benutzern werden nicht angezeigt) | |||
| Zeile 1: | Zeile 1: | ||
{{Infobox Raum FOS | {{Infobox Raum FOS | ||
| | |game =FOS | ||
|bild = | |bild =FoS outfit workshop.png | ||
|bewohner = 6 - Einfach Raum | |typ =herstellung | ||
|bevölkerung = 32 | |bewohner =6 - Einfach Raum | ||
|erzeugt = [[Fallout Shelter | |bevölkerung =32 | ||
|kosten = 800 | |erzeugt =[[Outfits (Fallout Shelter)|Outfits]] | ||
|baugröße = 1x3 | |kosten =800<br /> +1.300 je existierender Raum | ||
| | |baugröße =1x3 | ||
| | |kombinierbar =nein | ||
|fertigkeit =je nach hergestelltem Outfit | |||
}} | }} | ||
{{FOS}} | {{FOS}} | ||
Die '''Outfit-Werkstatt''' ist ein [[Fallout Shelter | Die '''Outfit-Werkstatt''' ist ein [[Räume (Fallout Shelter)|Raum]], der in {{FOS-2}} seit dem Update 1.4 gebaut werden kann. | ||
==Einleitung== | ==Einleitung== | ||
Die Outfit-Werkstatt ist ein Herstellungsraum der bei einer Vaultbevölkerung von 32 Bewohnern freischaltbar ist. Ähnlich wie die [[Waffenwerkstatt]] | Die Outfit-Werkstatt ist ein Herstellungsraum, der bei einer Vaultbevölkerung von 32 Bewohnern freischaltbar ist. Ähnlich wie die [[Waffenwerkstatt]] wird die Outfit-Werkstatt als ein Raum platziert, der den Platz von 3 Räumen einnimmt. | ||
Um die Geschwindigkeit mit der ein Outfit produziert wird zu erhöhen, platziere Bewohner mit der entsprechenden [[Fallout Shelter | Um die Geschwindigkeit, mit der ein Outfit produziert wird, zu erhöhen, platziere Bewohner mit der entsprechenden [[SPECIAL (Fallout Shelter)|SPECIAL]]-Fähigkeit in diesem Raum. Jedes Outfit hat hierbei seine eigene Anforderung. | ||
==Kosten== | ==Kosten== | ||
| Zeile 46: | Zeile 46: | ||
! Erforderlicher Schrott | ! Erforderlicher Schrott | ||
! {{icon|merchant|x18px|tooltip=Kosten zur Herstellung}} | ! {{icon|merchant|x18px|tooltip=Kosten zur Herstellung}} | ||
! [[ | ! [[Datei:Junk-CraftingOnly.png|18px|Nur Herstellbar]] | ||
|- | |- | ||
| [[Gepanzerter Vault-Anzug]] | | [[Gepanzerter Vault-Anzug]] | ||
| [[ | | [[Datei:FoS armored vault suit.png|50px]] | ||
| align="center" | P | | align="center" | P | ||
| P+3 | | P+3 | ||
| style="white-space: nowrap | | style="white-space: nowrap" | {{ItemCount|Junk-C-BaseballGlove.png|Baseballhandschuh}} | ||
{{ItemCount|Junk-C-Yarn.png|Garn}} | {{ItemCount|Junk-C-Yarn.png|Garn}} | ||
| align="center" | 5 | | align="center" | 5 | ||
| Zeile 58: | Zeile 58: | ||
|- | |- | ||
| [[Gefechtsrüstung]] | | [[Gefechtsrüstung]] | ||
| [[ | | [[Datei:FoS battle armor.png|50px]] | ||
| align="center" | S | | align="center" | S | ||
| S+2 E+1 | | S+2 E+1 | ||
| style="white-space: nowrap | | style="white-space: nowrap" | {{ItemCount|Junk-C-DeskFan.png|Tischventilator}} | ||
{{ItemCount|Junk-C-ToyCar.png|Spielzeugauto}} | {{ItemCount|Junk-C-ToyCar.png|Spielzeugauto}} | ||
| align="center" | 5 | | align="center" | 5 | ||
| Zeile 67: | Zeile 67: | ||
|- | |- | ||
| [[SB-Kampfanzug]] | | [[SB-Kampfanzug]] | ||
| [[ | | [[Datei:FoS BoS uniform.png|50px]] | ||
| align="center" | A | | align="center" | A | ||
| P+2, C+1 | | P+2, C+1 | ||
| style="white-space: nowrap | | style="white-space: nowrap" | {{ItemCount|Junk-C-AlarmClock.png|Wecker}} | ||
{{ItemCount|Junk-C-BaseballGlove.png|Baseballhandschuh}} | {{ItemCount|Junk-C-BaseballGlove.png|Baseballhandschuh}} | ||
| align="center" | 5 | | align="center" | 5 | ||
| Zeile 76: | Zeile 76: | ||
|- | |- | ||
| [[Kampfrüstung (Fallout Shelter)|Kampfrüstung]] | | [[Kampfrüstung (Fallout Shelter)|Kampfrüstung]] | ||
| [[ | | [[Datei:FoS combat armor.png|50px]] | ||
| align="center" | S | | align="center" | S | ||
| S+2 A+1 | | S+2 A+1 | ||
| style="white-space: nowrap | | style="white-space: nowrap" | {{ItemCount|Junk-C-BaseballGlove.png|Baseballhandschuh}} | ||
{{ItemCount|Junk-C-ToyCar.png|Spielzeugauto}} | {{ItemCount|Junk-C-ToyCar.png|Spielzeugauto}} | ||
| align="center" | 5 | | align="center" | 5 | ||
| Zeile 85: | Zeile 85: | ||
|- | |- | ||
| [[Pilotenanzug]] | | [[Pilotenanzug]] | ||
| [[ | | [[Datei:FoS flight suit.png|50px]] | ||
| align="center" | A | | align="center" | A | ||
| E+1 A+2 | | E+1 A+2 | ||
| style="white-space: nowrap | | style="white-space: nowrap" | {{ItemCount|Junk-C-BaseballGlove.png|Baseballhandschuh}} | ||
{{ItemCount|Junk-C-Yarn.png|Garn}} | {{ItemCount|Junk-C-Yarn.png|Garn}} | ||
| align="center" | 5 | | align="center" | 5 | ||
| Zeile 94: | Zeile 94: | ||
|- | |- | ||
| [[Förmliche Kleidung (Fallout Shelter)|Förmliche Kleidung]] | | [[Förmliche Kleidung (Fallout Shelter)|Förmliche Kleidung]] | ||
| [[ | | [[Datei:FoS formal wear.png|50px]] | ||
| align="center" | L | | align="center" | L | ||
| L+3 | | L+3 | ||
| style="white-space: nowrap | | style="white-space: nowrap" | {{ItemCount|Junk-C-Yarn.png|Garn|2}} | ||
| align="center" | 5 | | align="center" | 5 | ||
| align="center" | | | align="center" | | ||
|- | |- | ||
| [[Handwerker-Overall (Fallout Shelter)|Handwerker-Overall]] | | [[Handwerker-Overall (Fallout Shelter)|Handwerker-Overall]] | ||
| [[ | | [[Datei:FoS handyman jumpsuit.png|50px]] | ||
| align="center" | A | | align="center" | A | ||
| A+3 | | A+3 | ||
| style="white-space: nowrap | | style="white-space: nowrap" | {{ItemCount|Junk-C-BaseballGlove.png|Baseballhandschuh}} | ||
{{ItemCount|Junk-C-Yarn.png|Garn}} | {{ItemCount|Junk-C-Yarn.png|Garn}} | ||
| align="center" | 5 | | align="center" | 5 | ||
| Zeile 111: | Zeile 111: | ||
|- | |- | ||
| [[Anwärterrobe]] | | [[Anwärterrobe]] | ||
| [[ | | [[Datei:FoS Initiate robe.png|50px]] | ||
| align="center" | C | | align="center" | C | ||
| C+2 A+1 | | C+2 A+1 | ||
| style="white-space: nowrap | | style="white-space: nowrap" | {{ItemCount|Junk-C-BaseballGlove.png|Baseballhandschuh}} | ||
{{ItemCount|Junk-C-Yarn.png|Garn}} | {{ItemCount|Junk-C-Yarn.png|Garn}} | ||
| align="center" | 5 | | align="center" | 5 | ||
| Zeile 120: | Zeile 120: | ||
|- | |- | ||
| [[Unteroffiziersuniform]] | | [[Unteroffiziersuniform]] | ||
| [[ | | [[Datei:FoS officer uniform.png|50px]] | ||
| align="center" | I | | align="center" | I | ||
| C+1 I+2 | | C+1 I+2 | ||
| style="white-space: nowrap | | style="white-space: nowrap" | {{ItemCount|Junk-C-BaseballGlove.png|Baseballhandschuh}} | ||
{{ItemCount|Junk-C-Yarn.png|Garn}} | {{ItemCount|Junk-C-Yarn.png|Garn}} | ||
| align="center" | 5 | | align="center" | 5 | ||
| Zeile 129: | Zeile 129: | ||
|- | |- | ||
| [[Laborkittel (Fallout Shelter)|Laborkittel]] | | [[Laborkittel (Fallout Shelter)|Laborkittel]] | ||
| [[ | | [[Datei:FoS lab coat.png|50px]] | ||
| align="center" | I | | align="center" | I | ||
| I+3 | | I+3 | ||
| style="white-space: nowrap | | style="white-space: nowrap" | {{ItemCount|Junk-C-MagnifyingGlass.png|Lupe}} | ||
{{ItemCount|Junk-C-Yarn.png|Garn}} | {{ItemCount|Junk-C-Yarn.png|Garn}} | ||
| align="center" | 5 | | align="center" | 5 | ||
| Zeile 138: | Zeile 138: | ||
|- | |- | ||
| [[Lederrüstung (Fallout Shelter)|Lederrüstung]] | | [[Lederrüstung (Fallout Shelter)|Lederrüstung]] | ||
| [[ | | [[Datei:FoS leather armor.png|50px]] | ||
| align="center" | E | | align="center" | E | ||
| S+1 E+2 | | S+1 E+2 | ||
| style="white-space: nowrap | | style="white-space: nowrap" | {{ItemCount|Junk-C-BaseballGlove.png|Baseballhandschuh}} | ||
{{ItemCount|Junk-C-ToyCar.png|Spielzeugauto}} | {{ItemCount|Junk-C-ToyCar.png|Spielzeugauto}} | ||
| align="center" | 5 | | align="center" | 5 | ||
| Zeile 147: | Zeile 147: | ||
|- | |- | ||
| [[Söldnerausrüstung]] | | [[Söldnerausrüstung]] | ||
| [[ | | [[Datei:FoS merc gear.png|50px]] | ||
| align="center" | A | | align="center" | A | ||
| P+1 A+1 L+1 | | P+1 A+1 L+1 | ||
| style="white-space: nowrap | | style="white-space: nowrap" | {{ItemCount|Junk-C-BaseballGlove.png|Baseballhandschuh}} | ||
{{ItemCount|Junk-C-Yarn.png|Garn}} | {{ItemCount|Junk-C-Yarn.png|Garn}} | ||
| align="center" | 5 | | align="center" | 5 | ||
| Zeile 156: | Zeile 156: | ||
|- | |- | ||
| [[Militärbekleidung (Fallout Shelter)|Militärbekleidung]] | | [[Militärbekleidung (Fallout Shelter)|Militärbekleidung]] | ||
| [[ | | [[Datei:FoS military fatigues.png|50px]] | ||
| align="center" | S | | align="center" | S | ||
| S+3 | | S+3 | ||
| style="white-space: nowrap | | style="white-space: nowrap" | {{ItemCount|Junk-C-ToyCar.png|Spielzeugauto}} | ||
{{ItemCount|Junk-C-Yarn.png|Garn}} | {{ItemCount|Junk-C-Yarn.png|Garn}} | ||
| align="center" | 5 | | align="center" | 5 | ||
| Zeile 165: | Zeile 165: | ||
|- | |- | ||
| [[Schlafanzug]] | | [[Schlafanzug]] | ||
| [[ | | [[Datei:FoS nightwear.png|50px]] | ||
| align="center" | C | | align="center" | C | ||
| C+3 | | C+3 | ||
| style="white-space: nowrap | | style="white-space: nowrap" | {{ItemCount|Junk-C-DuctTape.png|Klebeband}} | ||
{{ItemCount|Junk-C-Yarn.png|Garn}} | {{ItemCount|Junk-C-Yarn.png|Garn}} | ||
| align="center" | 5 | | align="center" | 5 | ||
| Zeile 174: | Zeile 174: | ||
|- | |- | ||
| [[Strahlenschutzanzug (Fallout Shelter)|Strahlenschutzanzug]] | | [[Strahlenschutzanzug (Fallout Shelter)|Strahlenschutzanzug]] | ||
| [[ | | [[Datei:FoS radiation suit.png|50px]] | ||
| align="center" | E | | align="center" | E | ||
| P+1 E+2 | | P+1 E+2 | ||
| style="white-space: nowrap | | style="white-space: nowrap" | {{ItemCount|Junk-C-MagnifyingGlass.png|Lupe}} | ||
{{ItemCount|Junk-C-Yarn.png|Garn}} | {{ItemCount|Junk-C-Yarn.png|Garn}} | ||
| align="center" | 5 | | align="center" | 5 | ||
| Zeile 183: | Zeile 183: | ||
|- | |- | ||
| [[Raider-Rüstung (Fallout Shelter)|Raider-Rüstung]] | | [[Raider-Rüstung (Fallout Shelter)|Raider-Rüstung]] | ||
| [[ | | [[Datei:FoS raider armor.png|50px]] | ||
| align="center" | A | | align="center" | A | ||
| P+1 A+2 | | P+1 A+2 | ||
| style="white-space: nowrap | | style="white-space: nowrap" | {{ItemCount|Junk-C-BaseballGlove.png|Baseballhandschuh}} | ||
{{ItemCount|Junk-C-DuctTape.png|Klebeband}} | {{ItemCount|Junk-C-DuctTape.png|Klebeband}} | ||
| align="center" | 5 | | align="center" | 5 | ||
| Zeile 192: | Zeile 192: | ||
|- | |- | ||
| [[Schatzsucher-Ausrüstung]] | | [[Schatzsucher-Ausrüstung]] | ||
| [[ | | [[Datei:FoS hunter gear.png|50px]] | ||
| align="center" | S | | align="center" | S | ||
| S+2 P+1 | | S+2 P+1 | ||
| style="white-space: nowrap | | style="white-space: nowrap" | {{ItemCount|Junk-C-BaseballGlove.png|Baseballhandschuh}} | ||
{{ItemCount|Junk-C-Yarn.png|Garn}} | {{ItemCount|Junk-C-Yarn.png|Garn}} | ||
| align="center" | 5 | | align="center" | 5 | ||
| Zeile 201: | Zeile 201: | ||
|- | |- | ||
| [[Ödlandausrüstung]] | | [[Ödlandausrüstung]] | ||
| [[ | | [[Datei:FoS wasteland gear.png|50px]] | ||
| align="center" | E | | align="center" | E | ||
| E+3 | | E+3 | ||
| style="white-space: nowrap | | style="white-space: nowrap" | {{ItemCount|Junk-C-BaseballGlove.png|Baseballhandschuh}} | ||
{{ItemCount|Junk-C-MagnifyingGlass.png|Lupe}} | {{ItemCount|Junk-C-MagnifyingGlass.png|Lupe}} | ||
| align="center" | 5 | | align="center" | 5 | ||
| Zeile 210: | Zeile 210: | ||
|- | |- | ||
| [[Ödlandsanitäter]] | | [[Ödlandsanitäter]] | ||
| [[ | | [[Datei:FoS wasteland medic.png|50px]] | ||
| align="center" | P | | align="center" | P | ||
| P+2 L+1 | | P+2 L+1 | ||
| style="white-space: nowrap | | style="white-space: nowrap" | {{ItemCount|Junk-C-BaseballGlove.png|Baseballhandschuh}} | ||
{{ItemCount|Junk-C-Yarn.png|Garn}} | {{ItemCount|Junk-C-Yarn.png|Garn}} | ||
| align="center" | 5 | | align="center" | 5 | ||
| Zeile 219: | Zeile 219: | ||
|- | |- | ||
| [[Mechanikeroverall (Fallout Shelter)|Mechanikeroverall]] | | [[Mechanikeroverall (Fallout Shelter)|Mechanikeroverall]] | ||
| [[ | | [[Datei:FoS Mechanic jumpsuit.png|50px]] | ||
| align="center" | C | | align="center" | C | ||
| S+1 C+1 | | S+1 C+1 | ||
| style="white-space: nowrap | | style="white-space: nowrap" | {{ItemCount|Junk-C-Yarn.png|Garn}} | ||
| align="center" | 5 | | align="center" | 5 | ||
| align="center" | J | | align="center" | J | ||
|- | |- | ||
| [[Gepunktetes Sommerkleid]] | | [[Gepunktetes Sommerkleid]] | ||
| [[ | | [[Datei:FoS Polka dot sundress.png|50px]] | ||
| align="center" | I | | align="center" | I | ||
| S+1 I+1 | | S+1 I+1 | ||
| style="white-space: nowrap | | style="white-space: nowrap" | {{ItemCount|Junk-C-Yarn.png|Garn}} | ||
| align="center" | 5 | | align="center" | 5 | ||
| align="center" | J | | align="center" | J | ||
|- | |- | ||
| [[Vorkriegsvorstädter]] | | [[Vorkriegsvorstädter]] | ||
| [[ | | [[Datei:FoS Pre-war suburbanite.png|50px]] | ||
| align="center" | I | | align="center" | I | ||
| P+1 I+1 | | P+1 I+1 | ||
| style="white-space: nowrap | | style="white-space: nowrap" | {{ItemCount|Junk-C-Yarn.png|Garn}} | ||
| align="center" | 5 | | align="center" | 5 | ||
| align="center" | J | | align="center" | J | ||
|- | |- | ||
| [[Schulmeisterin]] | | [[Schulmeisterin]] | ||
| [[ | | [[Datei:Rural schoolmarm.png|50px]] | ||
| align="center" | E | | align="center" | E | ||
| P+1 E+1 | | P+1 E+1 | ||
| style="white-space: nowrap | | style="white-space: nowrap" | {{ItemCount|Junk-C-Yarn.png|Garn}} | ||
| align="center" | 5 | | align="center" | 5 | ||
| align="center" | J | | align="center" | J | ||
|- | |- | ||
| [[Frühjahrsbeleidung]] | | [[Frühjahrsbeleidung]] | ||
| [[ | | [[Datei:FoS Spring casualwear.png|50px]] | ||
| align="center" | E | | align="center" | E | ||
| E+1 A+1 | | E+1 A+1 | ||
| style="white-space: nowrap | | style="white-space: nowrap" | {{ItemCount|Junk-C-Yarn.png|Garn}} | ||
| align="center" | 5 | | align="center" | 5 | ||
| align="center" | J | | align="center" | J | ||
|- | |- | ||
| [[Vault-Promi]] | | [[Vault-Promi]] | ||
| [[ | | [[Datei:FoS Vault socialite.png|50px]] | ||
| align="center" | C | | align="center" | C | ||
| C+1 A+1 | | C+1 A+1 | ||
| style="white-space: nowrap | | style="white-space: nowrap" | {{ItemCount|Junk-C-Yarn.png|Garn}} | ||
| align="center" | 5 | | align="center" | 5 | ||
| align="center" | J | | align="center" | J | ||
| Zeile 268: | Zeile 268: | ||
==Seltene Outfits== | ==Seltene Outfits== | ||
Alle | Alle seltenen Outfits erfordern ein Rezept - [[Datei:FoS rare recipe.png|50px|Rezept für seltene Outfits]] | ||
{| class="va-table width=90% sortable" | {| class="va-table width=90% sortable" | ||
! Name | ! Name | ||
| Zeile 276: | Zeile 276: | ||
! Erforderlicher Schrott | ! Erforderlicher Schrott | ||
! {{icon|merchant|x18px|tooltip=Kosten zum herstellen}} | ! {{icon|merchant|x18px|tooltip=Kosten zum herstellen}} | ||
! [[ | ! [[Datei:Junk-CraftingOnly.png|18px|Nur Herstellbar]] | ||
|- | |- | ||
| [[Verbesserter SB-Kampfanzug]] | | [[Verbesserter SB-Kampfanzug]] | ||
| [[ | | [[Datei:FoS advanced BoS uniform.png|50px]] | ||
| align="center" | P | | align="center" | P | ||
| P+3, C+2 | | P+3, C+2 | ||
| style="white-space: nowrap | | style="white-space: nowrap" | {{ItemCount|Junk-R-BrahminHide.png|Brahminleder|4}} | ||
{{ItemCount|Junk-C-AlarmClock.png|Wecker|3}} | {{ItemCount|Junk-C-AlarmClock.png|Wecker|3}} | ||
{{ItemCount|Junk-C-Yarn.png|Garn|2}} | {{ItemCount|Junk-C-Yarn.png|Garn|2}} | ||
| Zeile 289: | Zeile 289: | ||
|- | |- | ||
| [[Verbesserter Pilotenanzug]] | | [[Verbesserter Pilotenanzug]] | ||
| [[ | | [[Datei:FoS flight suit.png|50px]] | ||
| align="center" | A | | align="center" | A | ||
| E+2 A+3 | | E+2 A+3 | ||
| style="white-space: nowrap | | style="white-space: nowrap" | {{ItemCount|Junk-R-BrahminHide.png|Brahminleder|4}} | ||
{{ItemCount|Junk-C-Yarn.png|Garn|4}} | {{ItemCount|Junk-C-Yarn.png|Garn|4}} | ||
{{ItemCount|Junk-C-BaseballGlove.png|Baseballhandschuh}} | {{ItemCount|Junk-C-BaseballGlove.png|Baseballhandschuh}} | ||
| Zeile 299: | Zeile 299: | ||
|- | |- | ||
| [[Verbesserter Institutspullover]] | | [[Verbesserter Institutspullover]] | ||
| [[ | | [[Datei:FoS Institute jumper.png|50px]] | ||
| align="center" | I | | align="center" | I | ||
| I+3, A+2 | | I+3, A+2 | ||
| style="white-space: nowrap | | style="white-space: nowrap" | {{ItemCount|Junk-C-BaseballGlove.png|Baseballhandschuh|4}} | ||
{{ItemCount|Junk-R-TeddyBear.png|Teddibär|4}} | {{ItemCount|Junk-R-TeddyBear.png|Teddibär|4}} | ||
{{ItemCount|Junk-C-Yarn.png|Garn}} | {{ItemCount|Junk-C-Yarn.png|Garn}} | ||
| Zeile 309: | Zeile 309: | ||
|- | |- | ||
| [[Verbesserter Overall]] | | [[Verbesserter Overall]] | ||
| [[ | | [[Datei:FoS handyman jumpsuit.png|50px]] | ||
| align="center" | A | | align="center" | A | ||
| A+5 | | A+5 | ||
| style="white-space: nowrap | | style="white-space: nowrap" | {{ItemCount|Junk-R-BrahminHide.png|Brahminleder|4}} | ||
{{ItemCount|Junk-C-Yarn.png|Garn|4}} | {{ItemCount|Junk-C-Yarn.png|Garn|4}} | ||
{{ItemCount|Junk-C-BaseballGlove.png|Baseballhandschuh}} | {{ItemCount|Junk-C-BaseballGlove.png|Baseballhandschuh}} | ||
| Zeile 319: | Zeile 319: | ||
|- | |- | ||
| [[Verbesserter Laborkittel]] | | [[Verbesserter Laborkittel]] | ||
| [[ | | [[Datei:FoS lab coat.png|50px]] | ||
| align="center" | I | | align="center" | I | ||
| I+5 | | I+5 | ||
| style="white-space: nowrap | | style="white-space: nowrap" | {{ItemCount|Junk-R-Microscope.png|Mikroskop|4}} | ||
{{ItemCount|Junk-C-Yarn.png|Garn|4}} | {{ItemCount|Junk-C-Yarn.png|Garn|4}} | ||
{{ItemCount|Junk-C-MagnifyingGlass.png|Lupe}} | {{ItemCount|Junk-C-MagnifyingGlass.png|Lupe}} | ||
| Zeile 329: | Zeile 329: | ||
|- | |- | ||
| [[Verbesserter Strahlenschutzanzug (Fallout Shelter)|Verbesserter Strahlenschutzanzug]] | | [[Verbesserter Strahlenschutzanzug (Fallout Shelter)|Verbesserter Strahlenschutzanzug]] | ||
| [[ | | [[Datei:FoS radiation suit.png|50px]] | ||
| align="center" | E | | align="center" | E | ||
| P+2, E+3 | | P+2, E+3 | ||
| style="white-space: nowrap | | style="white-space: nowrap" | {{ItemCount|Junk-R-TeddyBear.png|Teddibär|4}} | ||
{{ItemCount|Junk-C-MagnifyingGlass.png|Lupe|3}} | {{ItemCount|Junk-C-MagnifyingGlass.png|Lupe|3}} | ||
{{ItemCount|Junk-C-ToyCar.png|Spielzeugauto|2}} | {{ItemCount|Junk-C-ToyCar.png|Spielzeugauto|2}} | ||
| Zeile 339: | Zeile 339: | ||
|- | |- | ||
| [[Baseballkleidung (Fallout Shelter)|Baseballkleidung]] | | [[Baseballkleidung (Fallout Shelter)|Baseballkleidung]] | ||
| [[ | | [[Datei:FoS baseball uniform.png|50px]] | ||
| align="center" | A | | align="center" | A | ||
| A+4, L+1 | | A+4, L+1 | ||
| style="white-space: nowrap | | style="white-space: nowrap" | {{ItemCount|Junk-C-BaseballGlove.png|Baseballhandschuh|4}} | ||
{{ItemCount|Junk-R-TeddyBear.png|Teddibär|4}} | {{ItemCount|Junk-R-TeddyBear.png|Teddibär|4}} | ||
{{ItemCount|Junk-C-Yarn.png|Garn}} | {{ItemCount|Junk-C-Yarn.png|Garn}} | ||
| Zeile 349: | Zeile 349: | ||
|- | |- | ||
| [[Kopfgeldjäger-Ausrüstung]] | | [[Kopfgeldjäger-Ausrüstung]] | ||
| [[ | | [[Datei:FoS hunter gear.png|50px]] | ||
| align="center" | A | | align="center" | A | ||
| S+3, P+2 | | S+3, P+2 | ||
| style="white-space: nowrap | | style="white-space: nowrap" | {{ItemCount|Junk-R-BrahminHide.png|Brahminleder|4}} | ||
{{ItemCount|Junk-C-Yarn.png|Garn|4}} | {{ItemCount|Junk-C-Yarn.png|Garn|4}} | ||
{{ItemCount|Junk-C-BaseballGlove.png|Baseballhandschuh}} | {{ItemCount|Junk-C-BaseballGlove.png|Baseballhandschuh}} | ||
| Zeile 359: | Zeile 359: | ||
|- | |- | ||
| [[Geistlichenoutfit]] | | [[Geistlichenoutfit]] | ||
| [[ | | [[Datei:FoS clergy outfit.png|50px]] | ||
| align="center" | C | | align="center" | C | ||
| C+4, L+1 | | C+4, L+1 | ||
| style="white-space: nowrap | | style="white-space: nowrap" | {{ItemCount|Junk-C-BaseballGlove.png|Baseballhandschuh|4}} | ||
{{ItemCount|Junk-R-TeddyBear.png|Teddibär|4}} | {{ItemCount|Junk-R-TeddyBear.png|Teddibär|4}} | ||
{{ItemCount|Junk-C-Yarn.png|Garn}} | {{ItemCount|Junk-C-Yarn.png|Garn}} | ||
| Zeile 369: | Zeile 369: | ||
|- | |- | ||
| [[Komiker-Outfit]] | | [[Komiker-Outfit]] | ||
| [[ | | [[Datei:FoS Comedian Outfit.png|50px]] | ||
| align="center" | C | | align="center" | C | ||
| P+2, C+2, L+1 | | P+2, C+2, L+1 | ||
| style="white-space: nowrap | | style="white-space: nowrap" | {{ItemCount|Junk-R-TeddyBear.png|Teddibär|4}} | ||
{{ItemCount|Junk-C-BaseballGlove.png|Baseballhandschuh|3}} | {{ItemCount|Junk-C-BaseballGlove.png|Baseballhandschuh|3}} | ||
{{ItemCount|Junk-C-DuctTape.png|Klebeband|2}} | {{ItemCount|Junk-C-DuctTape.png|Klebeband|2}} | ||
| Zeile 379: | Zeile 379: | ||
|- | |- | ||
| [[Techniker-Outfit]] | | [[Techniker-Outfit]] | ||
| [[ | | [[Datei:FoS engineer outfit.png|50px]] | ||
| align="center" | I | | align="center" | I | ||
| E+2, I+2, L+1 | | E+2, I+2, L+1 | ||
| style="white-space: nowrap | | style="white-space: nowrap" | {{ItemCount|Junk-R-BrahminHide.png|Brahminleder|4}} | ||
{{ItemCount|Junk-C-ToyCar.png|Spielzeugauto|4}} | {{ItemCount|Junk-C-ToyCar.png|Spielzeugauto|4}} | ||
{{ItemCount|Junk-C-BaseballGlove.png|Baseballhandschuh}} | {{ItemCount|Junk-C-BaseballGlove.png|Baseballhandschuh}} | ||
| Zeile 389: | Zeile 389: | ||
|- | |- | ||
| [[Schicke förmliche Kleidung]] | | [[Schicke förmliche Kleidung]] | ||
| [[ | | [[Datei:FoS formal wear.png|50px]] | ||
| align="center" | L | | align="center" | L | ||
| L+5 | | L+5 | ||
| style="white-space: nowrap | | style="white-space: nowrap" | {{ItemCount|Junk-C-Yarn.png|Garn|5}} | ||
{{ItemCount|Junk-R-TeddyBear.png|Teddibär|4}} | {{ItemCount|Junk-R-TeddyBear.png|Teddibär|4}} | ||
| align="center" | 300 | | align="center" | 300 | ||
| Zeile 398: | Zeile 398: | ||
|- | |- | ||
| [[Greaser-Outfit]] | | [[Greaser-Outfit]] | ||
| [[ | | [[Datei:FoS Greaser outfit.png|50px]] | ||
| align="center" | C | | align="center" | C | ||
| C+2, A+2, L+1 | | C+2, A+2, L+1 | ||
| style="white-space: nowrap | | style="white-space: nowrap" | {{ItemCount|Junk-R-BrahminHide.png|Brahminleder|4}} | ||
{{ItemCount|Junk-C-Yarn.png|Garn|4}} | {{ItemCount|Junk-C-Yarn.png|Garn|4}} | ||
{{ItemCount|Junk-C-BaseballGlove.png|Baseballhandschuh}} | {{ItemCount|Junk-C-BaseballGlove.png|Baseballhandschuh}} | ||
| Zeile 408: | Zeile 408: | ||
|- | |- | ||
| [[Horrorfan-Outfit]] | | [[Horrorfan-Outfit]] | ||
| [[ | | [[Datei:FoS horror fan outfit.png|50px]] | ||
| align="center" | E | | align="center" | E | ||
| E+4, L+1 | | E+4, L+1 | ||
| style="white-space: nowrap | | style="white-space: nowrap" | {{ItemCount|Junk-R-TeddyBear.png|Teddibär|4}} | ||
{{ItemCount|Junk-C-ToyCar.png|Spielzeugauto|3}} | {{ItemCount|Junk-C-ToyCar.png|Spielzeugauto|3}} | ||
{{ItemCount|Junk-C-BaseballGlove.png|Baseballhandschuh|2}} | {{ItemCount|Junk-C-BaseballGlove.png|Baseballhandschuh|2}} | ||
| Zeile 418: | Zeile 418: | ||
|- | |- | ||
| [[Ritterrüstung]] | | [[Ritterrüstung]] | ||
| [[ | | [[Datei:FoS Knight armor.png|50px]] | ||
| align="center" | S | | align="center" | S | ||
| S+2, P+2, L+1 | | S+2, P+2, L+1 | ||
| style="white-space: nowrap | | style="white-space: nowrap" | {{ItemCount|Junk-R-BrahminHide.png|Brahminleder|4}} | ||
{{ItemCount|Junk-C-DeskFan.png|Tischventilator|4}} | {{ItemCount|Junk-C-DeskFan.png|Tischventilator|4}} | ||
{{ItemCount|Junk-C-BaseballGlove.png|Baseballhandschuh}} | {{ItemCount|Junk-C-BaseballGlove.png|Baseballhandschuh}} | ||
| Zeile 428: | Zeile 428: | ||
|- | |- | ||
| [[Bibliothekars-Outfit]] | | [[Bibliothekars-Outfit]] | ||
| [[ | | [[Datei:FoS librarian outfit.png|50px]] | ||
| align="center" | I | | align="center" | I | ||
| I+4, L+1 | | I+4, L+1 | ||
| style="white-space: nowrap | | style="white-space: nowrap" | {{ItemCount|Junk-C-MagnifyingGlass.png|Lupe|4}} | ||
{{ItemCount|Junk-R-TeddyBear.png|Teddibär|4}} | {{ItemCount|Junk-R-TeddyBear.png|Teddibär|4}} | ||
{{ItemCount|Junk-C-Yarn.png|Garn}} | {{ItemCount|Junk-C-Yarn.png|Garn}} | ||
| Zeile 438: | Zeile 438: | ||
|- | |- | ||
| [[Bademeister-Outfit]] | | [[Bademeister-Outfit]] | ||
| [[ | | [[Datei:FoS lifeguard outfit.png|50px]] | ||
| align="center" | P | | align="center" | P | ||
| P+4, L+1 | | P+4, L+1 | ||
| style="white-space: nowrap | | style="white-space: nowrap" | {{ItemCount|Junk-C-Yarn.png|Garn|5}} | ||
{{ItemCount|Junk-R-TeddyBear.png|Teddibär|4}} | {{ItemCount|Junk-R-TeddyBear.png|Teddibär|4}} | ||
| align="center" | 300 | | align="center" | 300 | ||
| Zeile 447: | Zeile 447: | ||
|- | |- | ||
| [[Bürgermeiser-Outfit]] | | [[Bürgermeiser-Outfit]] | ||
| [[ | | [[Datei:FoS mayor outfit.png|50px]] | ||
| align="center" | C | | align="center" | C | ||
| C+2, I+2, L+1 | | C+2, I+2, L+1 | ||
| style="white-space: nowrap | | style="white-space: nowrap" | {{ItemCount|Junk-C-MagnifyingGlass.png|Lupe|4}} | ||
{{ItemCount|Junk-R-TeddyBear.png|Teddibär|4}} | {{ItemCount|Junk-R-TeddyBear.png|Teddibär|4}} | ||
{{ItemCount|Junk-C-Yarn.png|Garn}} | {{ItemCount|Junk-C-Yarn.png|Garn}} | ||
| Zeile 457: | Zeile 457: | ||
|- | |- | ||
| [[Mittelalterliches Herrscheroutfit]] | | [[Mittelalterliches Herrscheroutfit]] | ||
| [[ | | [[Datei:FoS medieval ruler outfit.png|50px]] | ||
| align="center" | C | | align="center" | C | ||
| P+2, C+2, L+1 | | P+2, C+2, L+1 | ||
| style="white-space: nowrap | | style="white-space: nowrap" | {{ItemCount|Junk-C-BaseballGlove.png|Baseballhandschuh|4}} | ||
{{ItemCount|Junk-R-TeddyBear.png|Teddibär|4}} | {{ItemCount|Junk-R-TeddyBear.png|Teddibär|4}} | ||
{{ItemCount|Junk-C-Yarn.png|Garn}} | {{ItemCount|Junk-C-Yarn.png|Garn}} | ||
| Zeile 467: | Zeile 467: | ||
|- | |- | ||
| [[Filmfan-Outfit]] | | [[Filmfan-Outfit]] | ||
| [[ | | [[Datei:FoS movie fan outfit.png|50px]] | ||
| align="center" | P | | align="center" | P | ||
| P+4, L+1 | | P+4, L+1 | ||
| style="white-space: nowrap | | style="white-space: nowrap" | {{ItemCount|Junk-C-Yarn.png|Garn|5}} | ||
{{ItemCount|Junk-R-TeddyBear.png|Teddibär|4}} | {{ItemCount|Junk-R-TeddyBear.png|Teddibär|4}} | ||
| align="center" | 300 | | align="center" | 300 | ||
| Zeile 476: | Zeile 476: | ||
|- | |- | ||
| [[Neckischer Schlafanzug (Fallout Shelter)|Neckischer Schlafanzug]] | | [[Neckischer Schlafanzug (Fallout Shelter)|Neckischer Schlafanzug]] | ||
| [[ | | [[Datei:FoS nightwear.png|50px]] | ||
| align="center" | C | | align="center" | C | ||
| C+5 | | C+5 | ||
| style="white-space: nowrap | | style="white-space: nowrap" | {{ItemCount|Junk-C-DuctTape.png|Klebeband|4}} | ||
{{ItemCount|Junk-R-TeddyBear.png|Teddibär|4}} | {{ItemCount|Junk-R-TeddyBear.png|Teddibär|4}} | ||
{{ItemCount|Junk-C-Yarn.png|Garn}} | {{ItemCount|Junk-C-Yarn.png|Garn}} | ||
| Zeile 486: | Zeile 486: | ||
|- | |- | ||
| [[Ninja-Outfit]] | | [[Ninja-Outfit]] | ||
| [[ | | [[Datei:FoS ninja outfit.png|50px]] | ||
| align="center" | A | | align="center" | A | ||
| A+4, L+1 | | A+4, L+1 | ||
| style="white-space: nowrap | | style="white-space: nowrap" | {{ItemCount|Junk-R-TeddyBear.png|Teddibär|4}} | ||
{{ItemCount|Junk-C-BaseballGlove.png|Baseballhandschuh|3}} | {{ItemCount|Junk-C-BaseballGlove.png|Baseballhandschuh|3}} | ||
{{ItemCount|Junk-C-DuctTape.png|Klebeband|2}} | {{ItemCount|Junk-C-DuctTape.png|Klebeband|2}} | ||
| Zeile 496: | Zeile 496: | ||
|- | |- | ||
| [[Adelsoutfit]] | | [[Adelsoutfit]] | ||
| [[ | | [[Datei:FoS nobility outfit.png|50px]] | ||
| align="center" | I | | align="center" | I | ||
| E+2, I+2, L+1 | | E+2, I+2, L+1 | ||
| style="white-space: nowrap | | style="white-space: nowrap" | {{ItemCount|Junk-C-BaseballGlove.png|Baseballhandschuh|4}} | ||
{{ItemCount|Junk-R-TeddyBear.png|Teddibär|4}} | {{ItemCount|Junk-R-TeddyBear.png|Teddibär|4}} | ||
{{ItemCount|Junk-C-Yarn.png|Garn}} | {{ItemCount|Junk-C-Yarn.png|Garn}} | ||
| Zeile 506: | Zeile 506: | ||
|- | |- | ||
| [[Offiziersbekleidung]] | | [[Offiziersbekleidung]] | ||
| [[ | | [[Datei:FoS military fatigues.png|50px]] | ||
| align="center" | S | | align="center" | S | ||
| S+5 | | S+5 | ||
| style="white-space: nowrap | | style="white-space: nowrap" | {{ItemCount|Junk-R-TeddyBear.png|Teddibär|4}} | ||
{{ItemCount|Junk-C-ToyCar.png|Spielzeugauto|4}} | {{ItemCount|Junk-C-ToyCar.png|Spielzeugauto|4}} | ||
{{ItemCount|Junk-C-Yarn.png|Garn}} | {{ItemCount|Junk-C-Yarn.png|Garn}} | ||
| Zeile 516: | Zeile 516: | ||
|- | |- | ||
| [[Offiziersuniform]] | | [[Offiziersuniform]] | ||
| [[ | | [[Datei:FoS officer uniform.png|50px]] | ||
| align="center" | I | | align="center" | I | ||
| C+2, I+3 | | C+2, I+3 | ||
| style="white-space: nowrap | | style="white-space: nowrap" | {{ItemCount|Junk-C-BaseballGlove.png|Baseballhandschuh|4}} | ||
{{ItemCount|Junk-R-TeddyBear.png|Teddibär|4}} | {{ItemCount|Junk-R-TeddyBear.png|Teddibär|4}} | ||
{{ItemCount|Junk-C-Yarn.png|Garn}} | {{ItemCount|Junk-C-Yarn.png|Garn}} | ||
| Zeile 526: | Zeile 526: | ||
|- | |- | ||
| [[Professoren-Outfit]] | | [[Professoren-Outfit]] | ||
| [[ | | [[Datei:FoS professor outfit.png|50px]] | ||
| align="center" | I | | align="center" | I | ||
| L+1, I+4 | | L+1, I+4 | ||
| style="white-space: nowrap | | style="white-space: nowrap" | {{ItemCount|Junk-C-MagnifyingGlass.png|Lupe|4}} | ||
{{ItemCount|Junk-R-TeddyBear.png|Teddibär|4}} | {{ItemCount|Junk-R-TeddyBear.png|Teddibär|4}} | ||
{{ItemCount|Junk-C-Yarn.png|Garn}} | {{ItemCount|Junk-C-Yarn.png|Garn}} | ||
| Zeile 536: | Zeile 536: | ||
|- | |- | ||
| [[Robe der Republik]] | | [[Robe der Republik]] | ||
| [[ | | [[Datei:FoS republic robes.png|50px]] | ||
| align="center" | C | | align="center" | C | ||
| C+4, L+1 | | C+4, L+1 | ||
| style="white-space: nowrap | | style="white-space: nowrap" | {{ItemCount|Junk-R-TeddyBear.png|Teddibär|4}} | ||
{{ItemCount|Junk-C-ToyCar.png|Spielzeugauto|4}} | {{ItemCount|Junk-C-ToyCar.png|Spielzeugauto|4}} | ||
{{ItemCount|Junk-C-Yarn.png|Garn}} | {{ItemCount|Junk-C-Yarn.png|Garn}} | ||
| Zeile 546: | Zeile 546: | ||
|- | |- | ||
| [[Scifi-Fan-Outfit]] | | [[Scifi-Fan-Outfit]] | ||
| [[ | | [[Datei:FoS sci-fi fan outfit.png|50px]] | ||
| align="center" | I | | align="center" | I | ||
| I+2, A+2, L+1 | | I+2, A+2, L+1 | ||
| style="white-space: nowrap | | style="white-space: nowrap" | {{ItemCount|Junk-R-TeddyBear.png|Teddibär|4}} | ||
{{ItemCount|Junk-C-BaseballGlove.png|Baseballhandschuh|3}} | {{ItemCount|Junk-C-BaseballGlove.png|Baseballhandschuh|3}} | ||
{{ItemCount|Junk-C-DuctTape.png|Klebeband|2}} | {{ItemCount|Junk-C-DuctTape.png|Klebeband|2}} | ||
| Zeile 556: | Zeile 556: | ||
|- | |- | ||
| [[Gelehrtenrobe (Fallout Shelter)|Gelehrtenrobe]] | | [[Gelehrtenrobe (Fallout Shelter)|Gelehrtenrobe]] | ||
| [[ | | [[Datei:FoS Initiate robe.png|50px]] | ||
| align="center" | C | | align="center" | C | ||
| C+3, A+2 | | C+3, A+2 | ||
| style="white-space: nowrap | | style="white-space: nowrap" | {{ItemCount|Junk-R-BrahminHide.png|Brahminleder|4}} | ||
{{ItemCount|Junk-C-Yarn.png|Garn|4}} | {{ItemCount|Junk-C-Yarn.png|Garn|4}} | ||
{{ItemCount|Junk-C-BaseballGlove.png|Baseballhandschuh}} | {{ItemCount|Junk-C-BaseballGlove.png|Baseballhandschuh}} | ||
| Zeile 566: | Zeile 566: | ||
|- | |- | ||
| [[Soldatenuniform]] | | [[Soldatenuniform]] | ||
| [[ | | [[Datei:FoS soldier uniform.png|50px]] | ||
| align="center" | E | | align="center" | E | ||
| S+2, E+2, L+1 | | S+2, E+2, L+1 | ||
| style="white-space: nowrap | | style="white-space: nowrap" | {{ItemCount|Junk-C-Yarn.png|Garn|5}} | ||
{{ItemCount|Junk-R-TeddyBear.png|Teddibär|4}} | {{ItemCount|Junk-R-TeddyBear.png|Teddibär|4}} | ||
| align="center" | 300 | | align="center" | 300 | ||
| Zeile 575: | Zeile 575: | ||
|- | |- | ||
| [[Sportfan-Outfit]] | | [[Sportfan-Outfit]] | ||
| [[ | | [[Datei:FoS sports fan outfit.png|50px]] | ||
| align="center" | S | | align="center" | S | ||
| S+4, L+1 | | S+4, L+1 | ||
| style="white-space: nowrap | | style="white-space: nowrap" | {{ItemCount|Junk-C-BaseballGlove.png|Baseballhandschuh|4}} | ||
{{ItemCount|Junk-R-Globe.png|Globe|4}} | {{ItemCount|Junk-R-Globe.png|Globe|4}} | ||
{{ItemCount|Junk-C-ToyCar.png|Spielzeugauto}} | {{ItemCount|Junk-C-ToyCar.png|Spielzeugauto}} | ||
| Zeile 585: | Zeile 585: | ||
|- | |- | ||
| [[Robuste Gefechtsrüstung]] | | [[Robuste Gefechtsrüstung]] | ||
| [[ | | [[Datei:FoS battle armor.png|50px]] | ||
| align="center" | S | | align="center" | S | ||
| S+3, E+2 | | S+3, E+2 | ||
| style="white-space: nowrap | | style="white-space: nowrap" | {{ItemCount|Junk-R-Shovel.png|Shovel|4}} | ||
{{ItemCount|Junk-C-ToyCar.png|Spielzeugauto|3}} | {{ItemCount|Junk-C-ToyCar.png|Spielzeugauto|3}} | ||
{{ItemCount|Junk-C-BaseballGlove.png|Baseballhandschuh|2}} | {{ItemCount|Junk-C-BaseballGlove.png|Baseballhandschuh|2}} | ||
| Zeile 595: | Zeile 595: | ||
|- | |- | ||
| [[Robuste Kampfrüstung]] | | [[Robuste Kampfrüstung]] | ||
| [[ | | [[Datei:FoS combat armor.png|50px]] | ||
| align="center" | S | | align="center" | S | ||
| S+3, A+2 | | S+3, A+2 | ||
| style="white-space: nowrap | | style="white-space: nowrap" | {{ItemCount|Junk-C-BaseballGlove.png|Baseballhandschuh|4}} | ||
{{ItemCount|Junk-R-Globe.png|Globe|4}} | {{ItemCount|Junk-R-Globe.png|Globe|4}} | ||
{{ItemCount|Junk-C-ToyCar.png|Spielzeugauto}} | {{ItemCount|Junk-C-ToyCar.png|Spielzeugauto}} | ||
| Zeile 605: | Zeile 605: | ||
|- | |- | ||
| [[Robuste Lederrüstung]] | | [[Robuste Lederrüstung]] | ||
| [[ | | [[Datei:FoS leather armor.png|50px]] | ||
| align="center" | E | | align="center" | E | ||
| S+2, E+3 | | S+2, E+3 | ||
| style="white-space: nowrap | | style="white-space: nowrap" | {{ItemCount|Junk-R-BrahminHide.png|Brahminleder|4}} | ||
{{ItemCount|Junk-C-ToyCar.png|Spielzeugauto|4}} | {{ItemCount|Junk-C-ToyCar.png|Spielzeugauto|4}} | ||
{{ItemCount|Junk-C-BaseballGlove.png|Baseballhandschuh}} | {{ItemCount|Junk-C-BaseballGlove.png|Baseballhandschuh}} | ||
| Zeile 615: | Zeile 615: | ||
|- | |- | ||
| [[Robuste Söldnerausrüstung]] | | [[Robuste Söldnerausrüstung]] | ||
| [[ | | [[Datei:FoS merc gear.png|50px]] | ||
| align="center" | A | | align="center" | A | ||
| P+1, A+2, L+2 | | P+1, A+2, L+2 | ||
| style="white-space: nowrap | | style="white-space: nowrap" | {{ItemCount|Junk-R-BrahminHide.png|Brahminleder|4}} | ||
{{ItemCount|Junk-C-Yarn.png|Garn|4}} | {{ItemCount|Junk-C-Yarn.png|Garn|4}} | ||
{{ItemCount|Junk-C-BaseballGlove.png|Baseballhandschuh}} | {{ItemCount|Junk-C-BaseballGlove.png|Baseballhandschuh}} | ||
| Zeile 625: | Zeile 625: | ||
|- | |- | ||
| [[Robuste Metallrüstung]] | | [[Robuste Metallrüstung]] | ||
| [[ | | [[Datei:FoS metal armor.png|50px]] | ||
| align="center" | S | | align="center" | S | ||
| S+3, L+2 | | S+3, L+2 | ||
| style="white-space: nowrap | | style="white-space: nowrap" | {{ItemCount|Junk-C-BaseballGlove.png|Baseballhandschuh|4}} | ||
{{ItemCount|Junk-R-Shovel.png|Shovel|4}} | {{ItemCount|Junk-R-Shovel.png|Shovel|4}} | ||
{{ItemCount|Junk-C-DeskFan.png|Tischventilator}} | {{ItemCount|Junk-C-DeskFan.png|Tischventilator}} | ||
| Zeile 635: | Zeile 635: | ||
|- | |- | ||
| [[Robuste Raider-Rüstung]] | | [[Robuste Raider-Rüstung]] | ||
| [[ | | [[Datei:FoS raider armor.png|50px]] | ||
| align="center" | A | | align="center" | A | ||
| P+2, A+3 | | P+2, A+3 | ||
| style="white-space: nowrap | | style="white-space: nowrap" | {{ItemCount|Junk-R-BrahminHide.png|Brahminleder|4}} | ||
{{ItemCount|Junk-C-DuctTape.png|Klebeband|3}} | {{ItemCount|Junk-C-DuctTape.png|Klebeband|3}} | ||
{{ItemCount|Junk-C-DeskFan.png|Tischventilator|2}} | {{ItemCount|Junk-C-DeskFan.png|Tischventilator|2}} | ||
| Zeile 645: | Zeile 645: | ||
|- | |- | ||
| [[Robuster Vault-Anzug]] | | [[Robuster Vault-Anzug]] | ||
| [[ | | [[Datei:FoS armored vault suit.png|50px]] | ||
| align="center" | P | | align="center" | P | ||
| P+5 | | P+5 | ||
| style="white-space: nowrap | | style="white-space: nowrap" | {{ItemCount|Junk-C-BaseballGlove.png|Baseballhandschuh|4}} | ||
{{ItemCount|Junk-R-TeddyBear.png|Teddibär|4}} | {{ItemCount|Junk-R-TeddyBear.png|Teddibär|4}} | ||
{{ItemCount|Junk-C-Yarn.png|Garn}} | {{ItemCount|Junk-C-Yarn.png|Garn}} | ||
| Zeile 655: | Zeile 655: | ||
|- | |- | ||
| [[Robuste Ödlandausrüstung]] | | [[Robuste Ödlandausrüstung]] | ||
| [[ | | [[Datei:FoS wasteland gear.png|50px]] | ||
| align="center" | E | | align="center" | E | ||
| E+5 | | E+5 | ||
| style="white-space: nowrap | | style="white-space: nowrap" | {{ItemCount|Junk-R-BrahminHide.png|Brahminleder|4}} | ||
{{ItemCount|Junk-C-MagnifyingGlass.png|Lupe|3}} | {{ItemCount|Junk-C-MagnifyingGlass.png|Lupe|3}} | ||
{{ItemCount|Junk-C-ToyCar.png|Spielzeugauto|2}} | {{ItemCount|Junk-C-ToyCar.png|Spielzeugauto|2}} | ||
| Zeile 665: | Zeile 665: | ||
|- | |- | ||
| [[Chirurgen-Outfit]] | | [[Chirurgen-Outfit]] | ||
| [[ | | [[Datei:FoS wasteland medic.png|50px]] | ||
| align="center" | P | | align="center" | P | ||
| P+2, A+2, L+1 | | P+2, A+2, L+1 | ||
| style="white-space: nowrap | | style="white-space: nowrap" | {{ItemCount|Junk-R-BrahminHide.png|Brahminleder|4}} | ||
{{ItemCount|Junk-C-Yarn.png|Garn|3}} | {{ItemCount|Junk-C-Yarn.png|Garn|3}} | ||
{{ItemCount|Junk-C-MagnifyingGlass.png|Lupe|2}} | {{ItemCount|Junk-C-MagnifyingGlass.png|Lupe|2}} | ||
| Zeile 675: | Zeile 675: | ||
|- | |- | ||
| [[Uniform des Überlebenskünstlers]] | | [[Uniform des Überlebenskünstlers]] | ||
| [[ | | [[Datei:Survivor armor.png|50px]] | ||
| align="center" | A | | align="center" | A | ||
| S+2, A+2, L+1 | | S+2, A+2, L+1 | ||
| style="white-space: nowrap | | style="white-space: nowrap" | {{ItemCount|Junk-R-BrahminHide.png|Brahminleder|4}} | ||
{{ItemCount|Junk-C-ToyCar.png|Spielzeugauto|3}} | {{ItemCount|Junk-C-ToyCar.png|Spielzeugauto|3}} | ||
{{ItemCount|Junk-C-MagnifyingGlass.png|Lupe|2}} | {{ItemCount|Junk-C-MagnifyingGlass.png|Lupe|2}} | ||
| Zeile 685: | Zeile 685: | ||
|- | |- | ||
| [[Badeanzug]] | | [[Badeanzug]] | ||
| [[ | | [[Datei:FoS swimsuit.png|50px]] | ||
| align="center" | C | | align="center" | C | ||
| E+2, C+2, L+1 | | E+2, C+2, L+1 | ||
| style="white-space: nowrap | | style="white-space: nowrap" | {{ItemCount|Junk-C-DuctTape.png|Klebeband|4}} | ||
{{ItemCount|Junk-R-TeddyBear.png|Teddibär|4}} | {{ItemCount|Junk-R-TeddyBear.png|Teddibär|4}} | ||
{{ItemCount|Junk-C-Yarn.png|Garn}} | {{ItemCount|Junk-C-Yarn.png|Garn}} | ||
| Zeile 695: | Zeile 695: | ||
|- | |- | ||
| [[Ödlandarzt (Fallout Shelter)|Ödlandarzt]] | | [[Ödlandarzt (Fallout Shelter)|Ödlandarzt]] | ||
| [[ | | [[Datei:FoS wasteland medic.png|50px]] | ||
| align="center" | P | | align="center" | P | ||
| P+3, L+2 | | P+3, L+2 | ||
| style="white-space: nowrap | | style="white-space: nowrap" | {{ItemCount|Junk-R-TeddyBear.png|Teddibär|4}} | ||
{{ItemCount|Junk-C-BaseballGlove.png|Baseballhandschuh|3}} | {{ItemCount|Junk-C-BaseballGlove.png|Baseballhandschuh|3}} | ||
{{ItemCount|Junk-C-MagnifyingGlass.png|Lupe|2}} | {{ItemCount|Junk-C-MagnifyingGlass.png|Lupe|2}} | ||
| Zeile 705: | Zeile 705: | ||
|- | |- | ||
| [[Wrestler-Outfit]] | | [[Wrestler-Outfit]] | ||
| [[ | | [[Datei:FoS wrestler outfit.png|50px]] | ||
| align="center" | E | | align="center" | E | ||
| S+2, E+2, L+1 | | S+2, E+2, L+1 | ||
| style="white-space: nowrap | | style="white-space: nowrap" | {{ItemCount|Junk-R-BrahminHide.png|Brahminleder|4}} | ||
{{ItemCount|Junk-C-Yarn.png|Garn|3}} | {{ItemCount|Junk-C-Yarn.png|Garn|3}} | ||
{{ItemCount|Junk-C-DuctTape.png|Klebeband|2}} | {{ItemCount|Junk-C-DuctTape.png|Klebeband|2}} | ||
| Zeile 715: | Zeile 715: | ||
|- | |- | ||
| [[Doo-Wop-Sängerin]] | | [[Doo-Wop-Sängerin]] | ||
| [[ | | [[Datei:FoS Doo-wop singer.png|50px]] | ||
| align="center" | L | | align="center" | L | ||
| S+1, C+1, A+1, L+1 | | S+1, C+1, A+1, L+1 | ||
| style="white-space: nowrap | | style="white-space: nowrap" | {{ItemCount|Junk-R-TeddyBear.png|Teddibär|3}} | ||
{{ItemCount|Junk-C-Yarn.png|Garn|3}} | {{ItemCount|Junk-C-Yarn.png|Garn|3}} | ||
| align="center" | 250 | | align="center" | 250 | ||
| Zeile 724: | Zeile 724: | ||
|- | |- | ||
| [[Dragster-Fahrer]] | | [[Dragster-Fahrer]] | ||
| [[ | | [[Datei:FoS Drag racer.png|50px]] | ||
| align="center" | L | | align="center" | L | ||
| S+1, E+1, A+1, L+1 | | S+1, E+1, A+1, L+1 | ||
| style="white-space: nowrap | | style="white-space: nowrap" | {{ItemCount|Junk-R-TeddyBear.png|Teddibär|3}} | ||
{{ItemCount|Junk-C-Yarn.png|Garn|3}} | {{ItemCount|Junk-C-Yarn.png|Garn|3}} | ||
| align="center" | 250 | | align="center" | 250 | ||
| Zeile 733: | Zeile 733: | ||
|- | |- | ||
| [[Nachkriegs-Casanova]] | | [[Nachkriegs-Casanova]] | ||
| [[ | | [[Datei:FoS Post-war Casanova.png|50px]] | ||
| align="center" | L | | align="center" | L | ||
| P+1, C+1, I+1, L+1 | | P+1, C+1, I+1, L+1 | ||
| style="white-space: nowrap | | style="white-space: nowrap" | {{ItemCount|Junk-R-TeddyBear.png|Teddibär|3}} | ||
{{ItemCount|Junk-C-Yarn.png|Garn|3}} | {{ItemCount|Junk-C-Yarn.png|Garn|3}} | ||
| align="center" | 250 | | align="center" | 250 | ||
| Zeile 742: | Zeile 742: | ||
|- | |- | ||
| [[50er-Kleid]] | | [[50er-Kleid]] | ||
| [[ | | [[Datei:FoS Soda fountain dress.png|50px]] | ||
| align="center" | L | | align="center" | L | ||
| P+1, E+1, I+1, L+1 | | P+1, E+1, I+1, L+1 | ||
| style="white-space: nowrap | | style="white-space: nowrap" | {{ItemCount|Junk-R-TeddyBear.png|Teddibär|3}} | ||
{{ItemCount|Junk-C-Yarn.png|Garn|3}} | {{ItemCount|Junk-C-Yarn.png|Garn|3}} | ||
| align="center" | 250 | | align="center" | 250 | ||
| Zeile 752: | Zeile 752: | ||
==Legendäre Outfits== | ==Legendäre Outfits== | ||
Alle | Alle legendären Outfits erfordern ein Rezept - [[Datei:FoS legendary outfits recipe.png|50px|Rezept für legendäre Outfits]] | ||
{| class="va-table width=90% sortable" | {| class="va-table width=90% sortable" | ||
! Name | ! Name | ||
| Zeile 760: | Zeile 760: | ||
! Erforderlicher Schrott | ! Erforderlicher Schrott | ||
! {{icon|merchant|x18px|tooltip=Kosten für Herstellung}} | ! {{icon|merchant|x18px|tooltip=Kosten für Herstellung}} | ||
! [[ | ! [[Datei:Junk-CraftingOnly.png|18px|Nur Herstellung]] | ||
|- | |- | ||
| [[Abraham's relaxedwear]] | | [[Abraham's relaxedwear]] | ||
| [[ | | [[Datei:FoS Abraham's relaxedwear.png|50px]] | ||
| align="center" | I | | align="center" | I | ||
| E+1, I+2, A+2, L+2 | | E+1, I+2, A+2, L+2 | ||
| style="white-space: nowrap | | style="white-space: nowrap" | {{ItemCount|Junk-L-TrifoldAmericanFlag.png|Trifold American Flag|5}} | ||
{{ItemCount|Junk-R-TeddyBear.png|Teddy Bear|4}} | {{ItemCount|Junk-R-TeddyBear.png|Teddy Bear|4}} | ||
| align="center" | 21,000 | | align="center" | 21,000 | ||
| Zeile 772: | Zeile 772: | ||
|- | |- | ||
| [[Autumn's uniform]] | | [[Autumn's uniform]] | ||
| [[ | | [[Datei:FoS Colonel Autums uniform.png|50px]] | ||
| align="center" | P | | align="center" | P | ||
| S+2, P+2, E+2, C+1 | | S+2, P+2, E+2, C+1 | ||
| style="white-space: nowrap | | style="white-space: nowrap" | {{ItemCount|Junk-L-TrifoldAmericanFlag.png|Trifold American Flag|5}} | ||
{{ItemCount|Junk-R-BrahminHide.png|Brahmin Hide|4}} | {{ItemCount|Junk-R-BrahminHide.png|Brahmin Hide|4}} | ||
| align="center" | 21,000 | | align="center" | 21,000 | ||
| Zeile 781: | Zeile 781: | ||
|- | |- | ||
| [[Bittercup's outfit]] | | [[Bittercup's outfit]] | ||
| [[ | | [[Datei:FoS Bittercups outfit.png|50px]] | ||
| align="center" | S | | align="center" | S | ||
| S+2, P+2, E+2, C+1 | | S+2, P+2, E+2, C+1 | ||
| style="white-space: nowrap | | style="white-space: nowrap" | {{ItemCount|Junk-L-YaoGuaiHide.png|Yao Guai Hide|5}} | ||
{{ItemCount|Junk-R-BrahminHide.png|Brahmin Hide|4}} | {{ItemCount|Junk-R-BrahminHide.png|Brahmin Hide|4}} | ||
| align="center" | 21,000 | | align="center" | 21,000 | ||
| Zeile 790: | Zeile 790: | ||
|- | |- | ||
| [[Commander fatigues]] | | [[Commander fatigues]] | ||
| [[ | | [[Datei:FoS military fatigues.png|50px]] | ||
| align="center" | S | | align="center" | S | ||
| S+7 | | S+7 | ||
| style="white-space: nowrap | | style="white-space: nowrap" | {{ItemCount|Junk-L-TrifoldAmericanFlag.png|Trifold American Flag|5}} | ||
{{ItemCount|Junk-R-Globe.png|Globe|4}} | {{ItemCount|Junk-R-Globe.png|Globe|4}} | ||
| align="center" | 21,000 | | align="center" | 21,000 | ||
| Zeile 799: | Zeile 799: | ||
|- | |- | ||
| [[Commander uniform]] | | [[Commander uniform]] | ||
| [[ | | [[Datei:FoS officer uniform.png|50px]] | ||
| align="center" | I | | align="center" | I | ||
| C+3, I+4 | | C+3, I+4 | ||
| style="white-space: nowrap | | style="white-space: nowrap" | {{ItemCount|Junk-L-TrifoldAmericanFlag.png|Trifold American Flag|5}} | ||
{{ItemCount|Junk-R-BrahminHide.png|Brahmin Hide|4}} | {{ItemCount|Junk-R-BrahminHide.png|Brahmin Hide|4}} | ||
| align="center" | 21,000 | | align="center" | 21,000 | ||
| Zeile 808: | Zeile 808: | ||
|- | |- | ||
| [[Confessor Cromwell's rags]] | | [[Confessor Cromwell's rags]] | ||
| [[ | | [[Datei:Confessor Cromwells rags.png|50px]] | ||
| align="center" | L | | align="center" | L | ||
| P+2, E+2, L+2, I+1 | | P+2, E+2, L+2, I+1 | ||
| style="white-space: nowrap | | style="white-space: nowrap" | {{ItemCount|Junk-L-TrifoldAmericanFlag.png|Trifold American Flag|5}} | ||
{{ItemCount|Junk-R-BrahminHide.png|Brahmin Hide|4}} | {{ItemCount|Junk-R-BrahminHide.png|Brahmin Hide|4}} | ||
| align="center" | 21,000 | | align="center" | 21,000 | ||
| Zeile 817: | Zeile 817: | ||
|- | |- | ||
| [[Elder robe]] | | [[Elder robe]] | ||
| [[ | | [[Datei:FoS Elder robe.png|50px]] | ||
| align="center" | C | | align="center" | C | ||
| C+4, A+3 | | C+4, A+3 | ||
| style="white-space: nowrap | | style="white-space: nowrap" | {{ItemCount|Junk-L-YaoGuaiHide.png|Yao Guai Hide|5}} | ||
{{ItemCount|Junk-R-TeddyBear.png|Teddy Bear|4}} | {{ItemCount|Junk-R-TeddyBear.png|Teddy Bear|4}} | ||
| align="center" | 21,000 | | align="center" | 21,000 | ||
| Zeile 826: | Zeile 826: | ||
|- | |- | ||
| [[Eulogy Jones' suit (Fallout Shelter)|Eulogy Jones' suit]] | | [[Eulogy Jones' suit (Fallout Shelter)|Eulogy Jones' suit]] | ||
| [[ | | [[Datei:Eulogy Jones outfit.png|50px]] | ||
| align="center" | C | | align="center" | C | ||
| P+2, C+2, I+1, L+2 | | P+2, C+2, I+1, L+2 | ||
| style="white-space: nowrap | | style="white-space: nowrap" | {{ItemCount|Junk-L-TrifoldAmericanFlag.png|Trifold American Flag|5}} | ||
{{ItemCount|Junk-R-TeddyBear.png|Teddy Bear|4}} | {{ItemCount|Junk-R-TeddyBear.png|Teddy Bear|4}} | ||
| align="center" | 21,000 | | align="center" | 21,000 | ||
| Zeile 835: | Zeile 835: | ||
|- | |- | ||
| [[Expert BoS uniform]] | | [[Expert BoS uniform]] | ||
| [[ | | [[Datei:FoS expert BoS uniform.png|50px]] | ||
| align="center" | P | | align="center" | P | ||
| P+4, C+3 | | P+4, C+3 | ||
| style="white-space: nowrap | | style="white-space: nowrap" | {{ItemCount|Junk-R-TeddyBear.png|Teddy Bear|4}} | ||
{{ItemCount|Junk-L-YaoGuaiHide.png|Yao Guai Hide|3}} | {{ItemCount|Junk-L-YaoGuaiHide.png|Yao Guai Hide|3}} | ||
{{ItemCount|Junk-L-MilitaryCircuitBoard.png|Military Circuit Board|2}} | {{ItemCount|Junk-L-MilitaryCircuitBoard.png|Military Circuit Board|2}} | ||
| Zeile 845: | Zeile 845: | ||
|- | |- | ||
| [[Expert flight suit]] | | [[Expert flight suit]] | ||
| [[ | | [[Datei:FoS flight suit.png|50px]] | ||
| align="center" | A | | align="center" | A | ||
| E+3, A+4 | | E+3, A+4 | ||
| style="white-space: nowrap | | style="white-space: nowrap" | {{ItemCount|Junk-L-YaoGuaiHide.png|Yao Guai Hide|5}} | ||
{{ItemCount|Junk-R-TeddyBear.png|Teddy Bear|4}} | {{ItemCount|Junk-R-TeddyBear.png|Teddy Bear|4}} | ||
| align="center" | 21,000 | | align="center" | 21,000 | ||
| Zeile 854: | Zeile 854: | ||
|- | |- | ||
| [[Expert Institute jumper]] | | [[Expert Institute jumper]] | ||
| [[ | | [[Datei:FoS Institute jumper.png|50px]] | ||
| align="center" | I | | align="center" | I | ||
| I+4, A+3 | | I+4, A+3 | ||
| style="white-space: nowrap | | style="white-space: nowrap" | {{ItemCount|Junk-L-TrifoldAmericanFlag.png|Trifold American Flag|5}} | ||
{{ItemCount|Junk-R-BrahminHide.png|Brahmin Hide|4}} | {{ItemCount|Junk-R-BrahminHide.png|Brahmin Hide|4}} | ||
| align="center" | 21,000 | | align="center" | 21,000 | ||
| Zeile 863: | Zeile 863: | ||
|- | |- | ||
| [[Expert jumpsuit]] | | [[Expert jumpsuit]] | ||
| [[ | | [[Datei:FoS handyman jumpsuit.png|50px]] | ||
| align="center" | A | | align="center" | A | ||
| A+7 | | A+7 | ||
| style="white-space: nowrap | | style="white-space: nowrap" | {{ItemCount|Junk-L-YaoGuaiHide.png|Yao Guai Hide|5}} | ||
{{ItemCount|Junk-R-TeddyBear.png|Teddy Bear|4}} | {{ItemCount|Junk-R-TeddyBear.png|Teddy Bear|4}} | ||
| align="center" | 21,000 | | align="center" | 21,000 | ||
| Zeile 872: | Zeile 872: | ||
|- | |- | ||
| [[Expert lab coat]] | | [[Expert lab coat]] | ||
| [[ | | [[Datei:FoS lab coat.png|50px]] | ||
| align="center" | I | | align="center" | I | ||
| I+7 | | I+7 | ||
| style="white-space: nowrap | | style="white-space: nowrap" | {{ItemCount|Junk-L-ChemistryFlask.png|Chemistry Flask|5}} | ||
{{ItemCount|Junk-R-TeddyBear.png|Teddy Bear|4}} | {{ItemCount|Junk-R-TeddyBear.png|Teddy Bear|4}} | ||
| align="center" | 21,000 | | align="center" | 21,000 | ||
| Zeile 881: | Zeile 881: | ||
|- | |- | ||
| [[Expert radiation suit]] | | [[Expert radiation suit]] | ||
| [[ | | [[Datei:FoS radiation suit.png|50px]] | ||
| align="center" | E | | align="center" | E | ||
| P+3, E+4 | | P+3, E+4 | ||
| style="white-space: nowrap | | style="white-space: nowrap" | {{ItemCount|Junk-R-Globe.png|Globe|4}} | ||
{{ItemCount|Junk-L-TrifoldAmericanFlag.png|Trifold American Flag|3}} | {{ItemCount|Junk-L-TrifoldAmericanFlag.png|Trifold American Flag|3}} | ||
{{ItemCount|Junk-L-ChemistryFlask.png|Chemistry Flask|2}} | {{ItemCount|Junk-L-ChemistryFlask.png|Chemistry Flask|2}} | ||
| Zeile 891: | Zeile 891: | ||
|- | |- | ||
| [[Heavy battle armor]] | | [[Heavy battle armor]] | ||
| [[ | | [[Datei:FoS battle armor.png|50px]] | ||
| align="center" | S | | align="center" | S | ||
| S+4, E+3 | | S+4, E+3 | ||
| style="white-space: nowrap | | style="white-space: nowrap" | {{ItemCount|Junk-R-BrahminHide.png|Brahmin Hide|4}} | ||
{{ItemCount|Junk-L-GiddyupButtercup.png|Giddyup Buttercup|3}} | {{ItemCount|Junk-L-GiddyupButtercup.png|Giddyup Buttercup|3}} | ||
{{ItemCount|Junk-L-GoldWatch.png|Gold Watch|2}} | {{ItemCount|Junk-L-GoldWatch.png|Gold Watch|2}} | ||
| Zeile 901: | Zeile 901: | ||
|- | |- | ||
| [[Heavy combat armor]] | | [[Heavy combat armor]] | ||
| [[ | | [[Datei:FoS combat armor.png|50px]] | ||
| align="center" | S | | align="center" | S | ||
| S+4, A+3 | | S+4, A+3 | ||
| style="white-space: nowrap | | style="white-space: nowrap" | {{ItemCount|Junk-L-GoldWatch.png|Gold Watch|5}} | ||
{{ItemCount|Junk-R-BrahminHide.png|Brahmin Hide|4}} | {{ItemCount|Junk-R-BrahminHide.png|Brahmin Hide|4}} | ||
| align="center" | 21,000 | | align="center" | 21,000 | ||
| Zeile 910: | Zeile 910: | ||
|- | |- | ||
| [[Heavy leather armor]] | | [[Heavy leather armor]] | ||
| [[ | | [[Datei:FoS leather armor.png|50px]] | ||
| align="center" | E | | align="center" | E | ||
| S+3, E+4 | | S+3, E+4 | ||
| style="white-space: nowrap | | style="white-space: nowrap" | {{ItemCount|Junk-L-YaoGuaiHide.png|Yao Guai Hide|5}} | ||
{{ItemCount|Junk-R-Globe.png|Globe|4}} | {{ItemCount|Junk-R-Globe.png|Globe|4}} | ||
| align="center" | 21,000 | | align="center" | 21,000 | ||
| Zeile 919: | Zeile 919: | ||
|- | |- | ||
| [[Heavy merc gear]] | | [[Heavy merc gear]] | ||
| [[ | | [[Datei:FoS merc gear.png|50px]] | ||
| align="center" | A | | align="center" | A | ||
| P+2, A+3, L+2 | | P+2, A+3, L+2 | ||
| style="white-space: nowrap | | style="white-space: nowrap" | {{ItemCount|Junk-L-YaoGuaiHide.png|Yao Guai Hide|5}} | ||
{{ItemCount|Junk-R-TeddyBear.png|Teddy Bear|4}} | {{ItemCount|Junk-R-TeddyBear.png|Teddy Bear|4}} | ||
| align="center" | 21,000 | | align="center" | 21,000 | ||
| Zeile 928: | Zeile 928: | ||
|- | |- | ||
| [[Heavy metal armor]] | | [[Heavy metal armor]] | ||
| [[ | | [[Datei:FoS metal armor.png|50px]] | ||
| align="center" | S | | align="center" | S | ||
| S+4, L+3 | | S+4, L+3 | ||
| style="white-space: nowrap | | style="white-space: nowrap" | {{ItemCount|Junk-L-GiddyupButtercup.png|Giddyup Buttercup|5}} | ||
{{ItemCount|Junk-R-BrahminHide.png|Brahmin Hide|4}} | {{ItemCount|Junk-R-BrahminHide.png|Brahmin Hide|4}} | ||
| align="center" | 21,000 | | align="center" | 21,000 | ||
| Zeile 937: | Zeile 937: | ||
|- | |- | ||
| [[Heavy raider armor]] | | [[Heavy raider armor]] | ||
| [[ | | [[Datei:FoS raider armor.png|50px]] | ||
| align="center" | A | | align="center" | A | ||
| P+3, A+4 | | P+3, A+4 | ||
| style="white-space: nowrap | | style="white-space: nowrap" | {{ItemCount|Junk-R-Shovel.png|Shovel|4}} | ||
{{ItemCount|Junk-L-YaoGuaiHide.png|Yao Guai Hide|3}} | {{ItemCount|Junk-L-YaoGuaiHide.png|Yao Guai Hide|3}} | ||
{{ItemCount|Junk-L-MilitaryDuctTape.png|Military Duct Tape|2}} | {{ItemCount|Junk-L-MilitaryDuctTape.png|Military Duct Tape|2}} | ||
| Zeile 947: | Zeile 947: | ||
|- | |- | ||
| [[Heavy synth armor]] | | [[Heavy synth armor]] | ||
| [[ | | [[Datei:FoS synth armor.png|50px]] | ||
| align="center" | E | | align="center" | E | ||
| E+4, I+3 | | E+4, I+3 | ||
| style="white-space: nowrap | | style="white-space: nowrap" | {{ItemCount|Junk-L-GoldWatch.png|Gold Watch|5}} | ||
{{ItemCount|Junk-R-Shovel.png|Shovel|4}} | {{ItemCount|Junk-R-Shovel.png|Shovel|4}} | ||
| align="center" | 21,000 | | align="center" | 21,000 | ||
| Zeile 956: | Zeile 956: | ||
|- | |- | ||
| [[Heavy vault suit]] | | [[Heavy vault suit]] | ||
| [[ | | [[Datei:FoS armored vault suit.png|50px]] | ||
| align="center" | P | | align="center" | P | ||
| P+7 | | P+7 | ||
| style="white-space: nowrap | | style="white-space: nowrap" | {{ItemCount|Junk-L-TrifoldAmericanFlag.png|Trifold American Flag|5}} | ||
{{ItemCount|Junk-R-BrahminHide.png|Brahmin Hide|4}} | {{ItemCount|Junk-R-BrahminHide.png|Brahmin Hide|4}} | ||
| align="center" | 21,000 | | align="center" | 21,000 | ||
| Zeile 965: | Zeile 965: | ||
|- | |- | ||
| [[Heavy wasteland gear]] | | [[Heavy wasteland gear]] | ||
| [[ | | [[Datei:FoS wasteland gear.png|50px]] | ||
| align="center" | E | | align="center" | E | ||
| E+7 | | E+7 | ||
| style="white-space: nowrap | | style="white-space: nowrap" | {{ItemCount|Junk-R-Globe.png|Globe|4}} | ||
{{ItemCount|Junk-L-YaoGuaiHide.png|Yao Guai Hide|3}} | {{ItemCount|Junk-L-YaoGuaiHide.png|Yao Guai Hide|3}} | ||
{{ItemCount|Junk-L-ChemistryFlask.png|Chemistry Flask|2}} | {{ItemCount|Junk-L-ChemistryFlask.png|Chemistry Flask|2}} | ||
| Zeile 975: | Zeile 975: | ||
|- | |- | ||
| [[Lucky formal wear]] | | [[Lucky formal wear]] | ||
| [[ | | [[Datei:FoS formal wear.png|50px]] | ||
| align="center" | L | | align="center" | L | ||
| L+7 | | L+7 | ||
| style="white-space: nowrap | | style="white-space: nowrap" | {{ItemCount|Junk-L-TrifoldAmericanFlag.png|Trifold American Flag|5}} | ||
{{ItemCount|Junk-R-TeddyBear.png|Teddy Bear|4}} | {{ItemCount|Junk-R-TeddyBear.png|Teddy Bear|4}} | ||
| align="center" | 21,000 | | align="center" | 21,000 | ||
| Zeile 984: | Zeile 984: | ||
|- | |- | ||
| [[Lucky nightwear]] | | [[Lucky nightwear]] | ||
| [[ | | [[Datei:FoS nightwear.png|50px]] | ||
| align="center" | C | | align="center" | C | ||
| C+7 | | C+7 | ||
| style="white-space: nowrap | | style="white-space: nowrap" | {{ItemCount|Junk-L-TrifoldAmericanFlag.png|Trifold American Flag|5}} | ||
{{ItemCount|Junk-R-Wonderglue.png|Wonderglue|4}} | {{ItemCount|Junk-R-Wonderglue.png|Wonderglue|4}} | ||
| align="center" | 21,000 | | align="center" | 21,000 | ||
| Zeile 993: | Zeile 993: | ||
|- | |- | ||
| [[Minuteman uniform]] | | [[Minuteman uniform]] | ||
| [[ | | [[Datei:FoS Preston Garveys outfit.png|50px]] | ||
| align="center" | P | | align="center" | P | ||
| S+2, P+2, I+2, A+2 | | S+2, P+2, I+2, A+2 | ||
| style="white-space: nowrap | | style="white-space: nowrap" | {{ItemCount|Junk-L-TrifoldAmericanFlag.png|Trifold American Flag|5}} | ||
{{ItemCount|Junk-R-BrahminHide.png|Brahmin Hide|4}} | {{ItemCount|Junk-R-BrahminHide.png|Brahmin Hide|4}} | ||
{{ItemCount|Junk-L-YaoGuaiHide.png|Yao Guai Hide}} | {{ItemCount|Junk-L-YaoGuaiHide.png|Yao Guai Hide}} | ||
| Zeile 1.003: | Zeile 1.003: | ||
|- | |- | ||
| [[Mutant hunter gear]] | | [[Mutant hunter gear]] | ||
| [[ | | [[Datei:FoS hunter gear.png|50px]] | ||
| align="center" | S | | align="center" | S | ||
| S+4, P+3 | | S+4, P+3 | ||
| style="white-space: nowrap | | style="white-space: nowrap" | {{ItemCount|Junk-L-YaoGuaiHide.png|Yao Guai Hide|5}} | ||
{{ItemCount|Junk-R-TeddyBear.png|Teddy Bear|4}} | {{ItemCount|Junk-R-TeddyBear.png|Teddy Bear|4}} | ||
| align="center" | 21,000 | | align="center" | 21,000 | ||
| Zeile 1.012: | Zeile 1.012: | ||
|- | |- | ||
| [[Piper's outfit]] | | [[Piper's outfit]] | ||
| [[ | | [[Datei:FOS Piper Outfit.png|50px]] | ||
| align="center" | A | | align="center" | A | ||
| P+2, E+2, A+2, L+2 | | P+2, E+2, A+2, L+2 | ||
| style="white-space: nowrap | | style="white-space: nowrap" | {{ItemCount|Junk-L-YaoGuaiHide.png|Yao Guai Hide|5}} | ||
{{ItemCount|Junk-R-TeddyBear.png|Teddy Bear|4}} | {{ItemCount|Junk-R-TeddyBear.png|Teddy Bear|4}} | ||
{{ItemCount|Junk-L-TrifoldAmericanFlag.png|Trifold American Flag}} | {{ItemCount|Junk-L-TrifoldAmericanFlag.png|Trifold American Flag}} | ||
| Zeile 1.022: | Zeile 1.022: | ||
|- | |- | ||
| [[Scribe Rothchild's robe]] | | [[Scribe Rothchild's robe]] | ||
| [[ | | [[Datei:FoS Initiate robe.png|50px]] | ||
| align="center" | I | | align="center" | I | ||
| P+2, E+1, C+2, I+2 | | P+2, E+1, C+2, I+2 | ||
| style="white-space: nowrap | | style="white-space: nowrap" | {{ItemCount|Junk-L-YaoGuaiHide.png|Yao Guai Hide|5}} | ||
{{ItemCount|Junk-R-TeddyBear.png|Teddy Bear|4}} | {{ItemCount|Junk-R-TeddyBear.png|Teddy Bear|4}} | ||
| align="center" | 21,000 | | align="center" | 21,000 | ||
| Zeile 1.031: | Zeile 1.031: | ||
|- | |- | ||
| [[Sheriff's duster (Fallout Shelter)|Sheriff's duster]] | | [[Sheriff's duster (Fallout Shelter)|Sheriff's duster]] | ||
| [[ | | [[Datei:FoS Sheriffs duster.png|50px]] | ||
| align="center" | E | | align="center" | E | ||
| P+2, E+5 | | P+2, E+5 | ||
| style="white-space: nowrap | | style="white-space: nowrap" | {{ItemCount|Junk-L-TrifoldAmericanFlag.png|Trifold American Flag|5}} | ||
{{ItemCount|Junk-R-BrahminHide.png|Brahmin Hide|4}} | {{ItemCount|Junk-R-BrahminHide.png|Brahmin Hide|4}} | ||
| align="center" | 21,000 | | align="center" | 21,000 | ||
| Zeile 1.040: | Zeile 1.040: | ||
|- | |- | ||
| [[T-45a Powerrüstung]] | | [[T-45a Powerrüstung]] | ||
| [[ | | [[Datei:FoS T-45 power armor.png|50px]] | ||
| align="center" | P | | align="center" | P | ||
| S+2, P+3 | | S+2, P+3 | ||
| style="white-space: nowrap | | style="white-space: nowrap" | {{ItemCount|Junk-L-GiddyupButtercup.png|Giddyup Buttercup|3}} | ||
{{ItemCount|Junk-R-Camera.png|Kamera|2}} | {{ItemCount|Junk-R-Camera.png|Kamera|2}} | ||
{{ItemCount|Junk-R-Wonderglue.png|Superkleber|2}} | {{ItemCount|Junk-R-Wonderglue.png|Superkleber|2}} | ||
| Zeile 1.049: | Zeile 1.049: | ||
| align="center" | | | align="center" | | ||
|- | |- | ||
| [[T-45d Powerrüstung (Fallout Shelter)|T-45d Powerrüstung]] | | [[T-45d-Powerrüstung (Fallout Shelter)|T-45d-Powerrüstung]] | ||
| [[ | | [[Datei:FoS T-45 power armor.png|50px]] | ||
| align="center" | P | | align="center" | P | ||
| S+2, P+4 | | S+2, P+4 | ||
| style="white-space: nowrap | | style="white-space: nowrap" | {{ItemCount|Junk-R-Wonderglue.png|Superkleber|4}} | ||
{{ItemCount|Junk-L-GiddyupButtercup.png|Giddyup Buttercup|2}} | {{ItemCount|Junk-L-GiddyupButtercup.png|Giddyup Buttercup|2}} | ||
{{ItemCount|Junk-L-MilitaryCircuitBoard.png|Military Circuit Board|2}} | {{ItemCount|Junk-L-MilitaryCircuitBoard.png|Military Circuit Board|2}} | ||
| Zeile 1.060: | Zeile 1.060: | ||
|- | |- | ||
| [[T-45f Powerrüstung]] | | [[T-45f Powerrüstung]] | ||
| [[ | | [[Datei:FoS T-45 power armor.png|50px]] | ||
| align="center" | P | | align="center" | P | ||
| S+2, P+5 | | S+2, P+5 | ||
| style="white-space: nowrap | | style="white-space: nowrap" | {{ItemCount|Junk-R-Wonderglue.png|Superkleber|4}} | ||
{{ItemCount|Junk-L-GiddyupButtercup.png|Giddyup Buttercup|3}} | {{ItemCount|Junk-L-GiddyupButtercup.png|Giddyup Buttercup|3}} | ||
{{ItemCount|Junk-L-MilitaryCircuitBoard.png|Military Circuit Board|2}} | {{ItemCount|Junk-L-MilitaryCircuitBoard.png|Military Circuit Board|2}} | ||
| Zeile 1.070: | Zeile 1.070: | ||
|- | |- | ||
| [[T-51a Powerrüstung]] | | [[T-51a Powerrüstung]] | ||
| [[ | | [[Datei:FoS T-51 power armor.png|50px]] | ||
| align="center" | S | | align="center" | S | ||
| S+3, P+1 | | S+3, P+1 | ||
| style="white-space: nowrap | | style="white-space: nowrap" | {{ItemCount|Junk-R-Camera.png|Kamera|2}} | ||
{{ItemCount|Junk-L-GiddyupButtercup.png|Giddyup Buttercup|2}} | {{ItemCount|Junk-L-GiddyupButtercup.png|Giddyup Buttercup|2}} | ||
{{ItemCount|Junk-R-Wonderglue.png|Superkleber|2}} | {{ItemCount|Junk-R-Wonderglue.png|Superkleber|2}} | ||
| Zeile 1.080: | Zeile 1.080: | ||
|- | |- | ||
| [[T-51d Powerrüstung]] | | [[T-51d Powerrüstung]] | ||
| [[ | | [[Datei:FoS T-51 power armor.png|50px]] | ||
| align="center" | S | | align="center" | S | ||
| S+3, P+2 | | S+3, P+2 | ||
| style="white-space: nowrap | | style="white-space: nowrap" | {{ItemCount|Junk-L-GiddyupButtercup.png|Giddyup Buttercup|3}} | ||
{{ItemCount|Junk-R-Camera.png|Kamera|2}} | {{ItemCount|Junk-R-Camera.png|Kamera|2}} | ||
{{ItemCount|Junk-R-Wonderglue.png|Superkleber|2}} | {{ItemCount|Junk-R-Wonderglue.png|Superkleber|2}} | ||
| Zeile 1.090: | Zeile 1.090: | ||
|- | |- | ||
| [[T-51f Powerrüstung]] | | [[T-51f Powerrüstung]] | ||
| [[ | | [[Datei:FoS T-51 power armor.png|50px]] | ||
| align="center" | S | | align="center" | S | ||
| S+4, P+3 | | S+4, P+3 | ||
| style="white-space: nowrap | | style="white-space: nowrap" | {{ItemCount|Junk-R-Wonderglue.png|Superkleber|4}} | ||
{{ItemCount|Junk-L-GiddyupButtercup.png|Giddyup Buttercup|3}} | {{ItemCount|Junk-L-GiddyupButtercup.png|Giddyup Buttercup|3}} | ||
{{ItemCount|Junk-L-MilitaryCircuitBoard.png|Military Circuit Board|2}} | {{ItemCount|Junk-L-MilitaryCircuitBoard.png|Military Circuit Board|2}} | ||
| Zeile 1.100: | Zeile 1.100: | ||
|- | |- | ||
| [[T-60a Powerrüstung]] | | [[T-60a Powerrüstung]] | ||
| [[ | | [[Datei:FoS T-60 power armor.png|50px]] | ||
| align="center" | E | | align="center" | E | ||
| S+2, E+3 | | S+2, E+3 | ||
| style="white-space: nowrap | | style="white-space: nowrap" | {{ItemCount|Junk-L-GiddyupButtercup.png|Giddyup Buttercup|3}} | ||
{{ItemCount|Junk-R-Camera.png|Kamera|2}} | {{ItemCount|Junk-R-Camera.png|Kamera|2}} | ||
{{ItemCount|Junk-R-Wonderglue.png|Superkleber|2}} | {{ItemCount|Junk-R-Wonderglue.png|Superkleber|2}} | ||
| Zeile 1.110: | Zeile 1.110: | ||
|- | |- | ||
| [[T-60d Powerrüstung]] | | [[T-60d Powerrüstung]] | ||
| [[ | | [[Datei:FoS T-60 power armor.png|50px]] | ||
| align="center" | E | | align="center" | E | ||
| S+2, E+4 | | S+2, E+4 | ||
| style="white-space: nowrap | | style="white-space: nowrap" | {{ItemCount|Junk-R-Wonderglue.png|Superkleber|4}} | ||
{{ItemCount|Junk-L-GiddyupButtercup.png|Giddyup Buttercup|2}} | {{ItemCount|Junk-L-GiddyupButtercup.png|Giddyup Buttercup|2}} | ||
{{ItemCount|Junk-L-MilitaryCircuitBoard.png|Military Circuit Board|2}} | {{ItemCount|Junk-L-MilitaryCircuitBoard.png|Military Circuit Board|2}} | ||
| Zeile 1.120: | Zeile 1.120: | ||
|- | |- | ||
| [[T-60f Powerrüstung]] | | [[T-60f Powerrüstung]] | ||
| [[ | | [[Datei:FoS T-60 power armor.png|50px]] | ||
| align="center" | E | | align="center" | E | ||
| S+1 | | S+1, P+1, E+5 | ||
| style="white-space: nowrap | | style="white-space: nowrap" | {{ItemCount|Junk-R-Wonderglue.png|Superkleber|4}} | ||
{{ItemCount|Junk-L-GiddyupButtercup.png|Giddyup Buttercup|3}} | {{ItemCount|Junk-L-GiddyupButtercup.png|Giddyup Buttercup|3}} | ||
{{ItemCount|Junk-L-MilitaryCircuitBoard.png|Military Circuit Board|2}} | {{ItemCount|Junk-L-MilitaryCircuitBoard.png|Military Circuit Board|2}} | ||
| Zeile 1.130: | Zeile 1.130: | ||
|- | |- | ||
| [[Tenpenny's suit (Fallout Shelter)|Tenpenny's suit]] | | [[Tenpenny's suit (Fallout Shelter)|Tenpenny's suit]] | ||
| [[ | | [[Datei:FoS Tenpennys suit.png|50px]] | ||
| align="center" | I | | align="center" | I | ||
| P+2, C+2, I+2, L+1 | | P+2, C+2, I+2, L+1 | ||
| style="white-space: nowrap | | style="white-space: nowrap" | {{ItemCount|Junk-L-TrifoldAmericanFlag.png|Trifold American Flag|5}} | ||
{{ItemCount|Junk-R-TeddyBear.png|Teddy Bear|4}} | {{ItemCount|Junk-R-TeddyBear.png|Teddy Bear|4}} | ||
| align="center" | 21,000 | | align="center" | 21,000 | ||
| Zeile 1.139: | Zeile 1.139: | ||
|- | |- | ||
| [[Three Dog's outfit]] | | [[Three Dog's outfit]] | ||
| [[ | | [[Datei:FoS Three Dogs outfit.png|50px]] | ||
| align="center" | C | | align="center" | C | ||
| P+2, C+5 | | P+2, C+5 | ||
| style="white-space: nowrap | | style="white-space: nowrap" | {{ItemCount|Junk-L-YaoGuaiHide.png|Yao Guai Leder|5}} | ||
{{ItemCount|Junk-R-TeddyBear.png|Teddybär|4}} | {{ItemCount|Junk-R-TeddyBear.png|Teddybär|4}} | ||
| align="center" | 21,000 | | align="center" | 21,000 | ||
| Zeile 1.148: | Zeile 1.148: | ||
|- | |- | ||
| [[Tunnelschlangen-Outfit]] | | [[Tunnelschlangen-Outfit]] | ||
| [[ | | [[Datei:FoS Tunnel Snakes outfit.png|50px]] | ||
| align="center" | C | | align="center" | C | ||
| P+2, E+1, C+2, A+2 | | P+2, E+1, C+2, A+2 | ||
| style="white-space: nowrap | | style="white-space: nowrap" | {{ItemCount|Junk-L-YaoGuaiHide.png|Yao Guai Hide|5}} | ||
{{ItemCount|Junk-R-TeddyBear.png|Teddy Bear|4}} | {{ItemCount|Junk-R-TeddyBear.png|Teddy Bear|4}} | ||
| align="center" | 21,000 | | align="center" | 21,000 | ||
| Zeile 1.157: | Zeile 1.157: | ||
|- | |- | ||
| [[Wasteland surgeon]] | | [[Wasteland surgeon]] | ||
| [[ | | [[Datei:FoS wasteland medic.png|50px]] | ||
| align="center" | P | | align="center" | P | ||
| P+4, L+3 | | P+4, L+3 | ||
| style="white-space: nowrap | | style="white-space: nowrap" | {{ItemCount|Junk-R-Microscope.png|Microscope|4}} | ||
{{ItemCount|Junk-L-TrifoldAmericanFlag.png|Trifold American Flag|3}} | {{ItemCount|Junk-L-TrifoldAmericanFlag.png|Trifold American Flag|3}} | ||
{{ItemCount|Junk-L-YaoGuaiHide.png|Yao Guai Hide|2}} | {{ItemCount|Junk-L-YaoGuaiHide.png|Yao Guai Hide|2}} | ||
| Zeile 1.167: | Zeile 1.167: | ||
|- | |- | ||
| [[X-01 Mk I Powerrüstung]] | | [[X-01 Mk I Powerrüstung]] | ||
| [[ | | [[Datei:FoS X-01 Mk IV power armor.png|50px]] | ||
| align="center" | S | | align="center" | S | ||
| S+3, P+1, E+1 | | S+3, P+1, E+1 | ||
| style="white-space: nowrap | | style="white-space: nowrap" | {{ItemCount|Junk-L-GiddyupButtercup.png|Giddyup Buttercup|3}} | ||
{{ItemCount|Junk-R-Camera.png|Kamera|2}} | {{ItemCount|Junk-R-Camera.png|Kamera|2}} | ||
{{ItemCount|Junk-R-Wonderglue.png|Superkleber|2}} | {{ItemCount|Junk-R-Wonderglue.png|Superkleber|2}} | ||
| Zeile 1.177: | Zeile 1.177: | ||
|- | |- | ||
| [[X-01 Mk IV Powerrüstung]] | | [[X-01 Mk IV Powerrüstung]] | ||
| [[ | | [[Datei:FoS X-01 Mk IV power armor.png|50px]] | ||
| align="center" | S | | align="center" | S | ||
| S+4, P+1, E+1 | | S+4, P+1, E+1 | ||
| style="white-space: nowrap | | style="white-space: nowrap" | {{ItemCount|Junk-R-Wonderglue.png|Superkleber|4}} | ||
{{ItemCount|Junk-L-GiddyupButtercup.png|Giddyup Buttercup|2}} | {{ItemCount|Junk-L-GiddyupButtercup.png|Giddyup Buttercup|2}} | ||
{{ItemCount|Junk-L-MilitaryCircuitBoard.png|Military Circuit Board|2}} | {{ItemCount|Junk-L-MilitaryCircuitBoard.png|Military Circuit Board|2}} | ||
| Zeile 1.187: | Zeile 1.187: | ||
|- | |- | ||
| [[X-01 Mk VI Powerrüstung]] | | [[X-01 Mk VI Powerrüstung]] | ||
| [[ | | [[Datei:FoS X-01 Mk IV power armor.png|50px]] | ||
| align="center" | S | | align="center" | S | ||
| S+5, P+1, E+1 | | S+5, P+1, E+1 | ||
| style="white-space: nowrap | | style="white-space: nowrap" | {{ItemCount|Junk-R-Wonderglue.png|Superkleber|4}} | ||
{{ItemCount|Junk-L-GiddyupButtercup.png|Giddyup Buttercup|3}} | {{ItemCount|Junk-L-GiddyupButtercup.png|Giddyup Buttercup|3}} | ||
{{ItemCount|Junk-L-MilitaryCircuitBoard.png|Military Circuit Board|2}} | {{ItemCount|Junk-L-MilitaryCircuitBoard.png|Military Circuit Board|2}} | ||
| Zeile 1.198: | Zeile 1.198: | ||
==Produktionszeit== | ==Produktionszeit== | ||
Produktionszeit für Outfits basiert auf der Seltenheit des Outfits und der kombinierten [[SPECIAL]] Stufe für die SPECIAL Stat welches für das Outfit Rezept benötigt wird. Für {{Legendär|legendäre}} Outfits spielen die Kosten auch eine Rolle für die Produktionszeit. Ausgabe von +3, +5, | Produktionszeit für Outfits basiert auf der Seltenheit des Outfits und der kombinierten [[SPECIAL]] Stufe für die SPECIAL Stat welches für das Outfit Rezept benötigt wird. Für {{Legendär|legendäre}} Outfits spielen die Kosten auch eine Rolle für die Produktionszeit. Ausgabe von +3, +5, oder +7 Outfits an deine Bewohner kann die Produktionszeit Signifikant reduzieren. Die Verringerung in der Zeit verhält sich linear zu den Zeiten in der Tabelle unterhalb - jeder SPECIAL Punkt der zu dem Outfit hinzugefügt wird ergibt eine durchschnittliche Verkürzung von 1% in der Dauer (ein +7 Outfit ergibt ~7% Verringerung). | ||
{| class="va-table va-table-full va-table-center" | {| class="va-table va-table-full va-table-center" | ||
! rowspan="2" | Bewohner stats | ! rowspan="2" | Bewohner stats | ||
! rowspan="2" | Kombiniert Gesammt | ! rowspan="2" | Kombiniert Gesammt | ||
! {{ | ! {{Normal}} | ||
! {{Selten}} | ! {{Selten}} | ||
! colspan="5" | {{Legendär}} | ! colspan="5" | {{Legendär}} | ||
| Zeile 1.264: | Zeile 1.264: | ||
|} | |} | ||
== | ==Galerie== | ||
<gallery> | <gallery> | ||
FoS outfitworkshop lvl1.jpg|Outfit-Werkstatt | FoS outfitworkshop lvl1.jpg|Outfit-Werkstatt | ||
| Zeile 1.275: | Zeile 1.275: | ||
{{Navbox Räume FOS}} | {{Navbox Räume FOS}} | ||
[[en: | [[en:Outfit workshop]] | ||
[[es:Taller de atuendos]] | [[es:Taller de atuendos]] | ||
[[ru:Мастерская костюмов]] | [[ru:Мастерская костюмов]] | ||
[[uk:Майстерня костюмів]] | [[uk:Майстерня костюмів]] | ||
[[Kategorie:Fallout Shelter Räume]] | [[Kategorie:Fallout Shelter: Räume (Herstellung)]] | ||
Aktuelle Version vom 2. November 2024, 17:18 Uhr
| Die nachfolgenden Informationen basieren auf Fallout Shelter oder Fallout Shelter Online. |
Die Outfit-Werkstatt ist ein Raum, der in ![]() Fallout Shelter seit dem Update 1.4 gebaut werden kann.
Fallout Shelter seit dem Update 1.4 gebaut werden kann.
Einleitung
Die Outfit-Werkstatt ist ein Herstellungsraum, der bei einer Vaultbevölkerung von 32 Bewohnern freischaltbar ist. Ähnlich wie die Waffenwerkstatt wird die Outfit-Werkstatt als ein Raum platziert, der den Platz von 3 Räumen einnimmt.
Um die Geschwindigkeit, mit der ein Outfit produziert wird, zu erhöhen, platziere Bewohner mit der entsprechenden SPECIAL-Fähigkeit in diesem Raum. Jedes Outfit hat hierbei seine eigene Anforderung.
Kosten
| Kosten | Bevölkerungsanforderung | Seltenheit erlaubt | |
|---|---|---|---|
| Outfit-Fabrik | 12000 | 55 | selten |
| Outfit-Werk | 90000 | 90 | legendär |
Gewöhnliche Outfits

Seltene Outfits
Alle seltenen Outfits erfordern ein Rezept - ![]()

Legendäre Outfits
Alle legendären Outfits erfordern ein Rezept - ![]()


Produktionszeit
Produktionszeit für Outfits basiert auf der Seltenheit des Outfits und der kombinierten SPECIAL Stufe für die SPECIAL Stat welches für das Outfit Rezept benötigt wird. Für legendäre Outfits spielen die Kosten auch eine Rolle für die Produktionszeit. Ausgabe von +3, +5, oder +7 Outfits an deine Bewohner kann die Produktionszeit Signifikant reduzieren. Die Verringerung in der Zeit verhält sich linear zu den Zeiten in der Tabelle unterhalb - jeder SPECIAL Punkt der zu dem Outfit hinzugefügt wird ergibt eine durchschnittliche Verkürzung von 1% in der Dauer (ein +7 Outfit ergibt ~7% Verringerung).
| Bewohner stats | Kombiniert Gesammt | normal | selten | legendär | ||||
|---|---|---|---|---|---|---|---|---|
| 5 |
300 |
16,250 |
17,850 |
19,400 |
21,000 |
22,500 | ||
| leer (Basiszeit) | 0 | 1h 26m 23s | 9h 36m 0s | 11d 21h 35m | 14d 0h 0m | 15d 1h 12m | ||
| 1 | 1 | 1h 25m 27s | 9h 29m 47s | 11d 18h 52m | 13d 20h 48m | 14d 21h 46m | ||
| 2 | 2 | 1h 24m 31s | 9h 23m 34s | 13d 17h 36m | ||||
| 3 | 3 | 1h 23m 35s | 9h 17m 21s | 11d 13h 26m | 13d 14h 24m | 14d 14h 54m | ||
| 4 | 4 | 1h 22m 39s | 9h 11m 9s | 13d 11h 13m | ||||
| 5 | 5 | 1h 21m 43s | 9h 4m 56s | 13d 8h 1m | ||||
| 6 | 6 | 1h 20m 47s | 8h 58m 43s | |||||
| 7 | 7 | 1h 19m 51s | 8h 52m 31s | 13d 1h 38m | ||||
| 8 | 8 | 1h 18m 55s | 8h 46m 18s | |||||
| 9 | 9 | 1h 17m 59s | 8h 40m 5s | 12d 19h 14m | ||||
| 10 | 10 | 1h 17m 9s | 8h 34m 26s | 9d 19h 40m | 10d 18h 23m | 11d 17h 13m | 12d 16h 2m | 13d 14h 52m |
| 10+10 | 20 | 1h 7m 55s | 7h 32m 53s | 8d 18h 56m | 9d 15h 11m | 10d 11h 38m | 11d 8h 5m | 12d 4h 33m |
| 10+10+10 | 30 | 58m 41s | 6h 31m 20s | 7d 18h 12m | 8d 11h 58m | 9d 6h 3m | 10d 0h 8m | 10d 18h 13m |
| 10+10+10+10 | 40 | 49m 27s | 5h 29m 47s | 6d 17h 29m | 7d 8h 46m | 8d 0h 28m | 8d 16h 11m | 9d 7h 54m |
| 10+10+10+10+10 | 50 | 40m 13s | 4h 28m 14s | 5d 16h 45m | 6d 5h 33m | 6d 18h 54m | 7d 8h 14m | 7d 21h 34m |
| 10+10+10+10+10+10 | 60 | 30m 59s | 3h 26m 40s | 4d 16h 1m | 5d 2h 21m | 5d 13h 19m | 6d 0h 17m | 6d 11h 15m |
| 13+13+13+13+13+13 | 78 | 14m 22s | 1h 35m 53s | 2d 19h 31m | 3d 1h 23m | 3d 8h 4m | 3d 14h 46m | 3d 21h 28m |
| 15+15+15+15+15+15 | 90 | 3m 18s | 22m 1s | 1d 13h 50m | 1d 16h 44m | 1d 20h 19m | 2d 0h 25m | 2d 4h 16m |
| 17+15+15+15+15+15 | 92 | 2m 52s | 9m 42s | 1d 8h 54m | 1d 11h 17m | 1d 14h 40m | 1d 18h 2m | 1d 21h 24m |
| 17+17+15+15+15+15 | 94 | 2m 52s | 2m 52s | 1d 3h 57m | 1d 5h 51m | 1d 8h 45m | 1d 11h 39m | 1d 14h 33m |
| 17+17+17+15+15+15 | 96 | 2m 52s | 2m 52s | 23h 0m 38s | 1d 0h 24m | 1d 2h 50m | 1d 5h 15m | 1d 7h 41m |
| 17+17+17+17+15+15 | 98 | 2m 52s | 2m 52s | 18h 3m 54s | 18h 58m 8s | 20h 55m 11s | 22h 52m 14s | 1d 0h 49m |
| 17+17+17+17+17+15 | 100 | 2m 52s | 2m 52s | 13h 7m 10s | 13h 31m 38s | 15h 0m 14s | 16h 28m 49s | 17h 57m 24s |
| 17+17+17+17+17+17 | 102 | 2m 52s | 2m 52s | 8h 10m 26s | 8h 5m 9s | 9h 5m 16s | 10h 5m 24s | 11h 5m 31s |
Galerie
-
 Outfit-Werkstatt
 -
 Outfit-Fabrik
 -
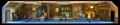 Outfit Plant
 -
 Rezept für seltene Outfits
 -
 Rezept für legendäre Outfits


| ||||||||||||||||||||||||
es:Taller de atuendos ru:Мастерская костюмов uk:Майстерня костюмів